
Ahhhh Spring…..When you can feel that sense of transition, the cold and dark start to fade away, the sun begins to shine brightly once more, plants and flowers bloom, and the animals emerge once again. Spring is a time for us to embark on new journeys and start new projects with fresh ideas. Spring is just so refreshing and makes me feel motivated, I feel like challenging myself to try new things! This brings me to this month’s kids yoga theme. Trying something new and challenging like inversions!!
What is a yoga inversion?
Yoga inversions are a category of yoga poses, that place your head below your heart and hips, therefore “inverting” your body from its normal upright position.
Any pose in which your heart is higher from the ground than your head is considered an inversion.
When I teach kids yoga classes, their all time favorite thing to practice is always inversions and arm balances. Obviously safety is crucial when teaching inversions. Some kids are so eager to try it and end up whipping right into a headstand as soon as you say the word but you must be ready for that and have them watch first. I always take the students through the pose step by step and allow them to see the proper technique so they can practice correctly and safely.
Inversions can sound scary to try…especially with kids. The great news is that Inversions do not need to be difficult to do and the benefits are enormous.
Benefits of inversions
Improves circulation and brain activity – flushing refreshed blood and nutrients around the whole body, especially the brain.
Gives the heart a break – as the heart is constantly working to pump blood upward towards the brain, inversions assist in the flow of blood to the brain, with little work from the heart.
Improves immunity – inversions help to stimulate lymphatic cleansing and drainage which assists in clearing toxins from the body.
Stimulates the nervous system – increasing mental alertness and clarity.
Natural antidepressant – flushing the adrenal glands stimulating the release of endorphins.
Glowing skin – by reversing the flow and ageing force of gravity, new oxygen stimulates the capillaries in the skin and face.
Increases the digestive fire – aiding the digestive and elimination process.
Energizes the body – increasing core strength and improves posture.
Calms the mind – relieving stress, assisting with better seep patterns.
Builds confidence – and most importantly is fun!
Tips to practicing inversions safely
Always practice safely and mindfully – Start gradually with variations that allow your child to build up strength and flexibility. Try using a wall for support to begin before freestanding.
Be aware of your body in alignment – If you feel like their alignment is not quite right, have them come out of the inversion first, make the adjustments and then come back into the pose. Avoid making adjustments while inverted.
Work through this list of yoga inversions one at a time, taking care to rest between each new pose, without rushing your body.
Inversions to try
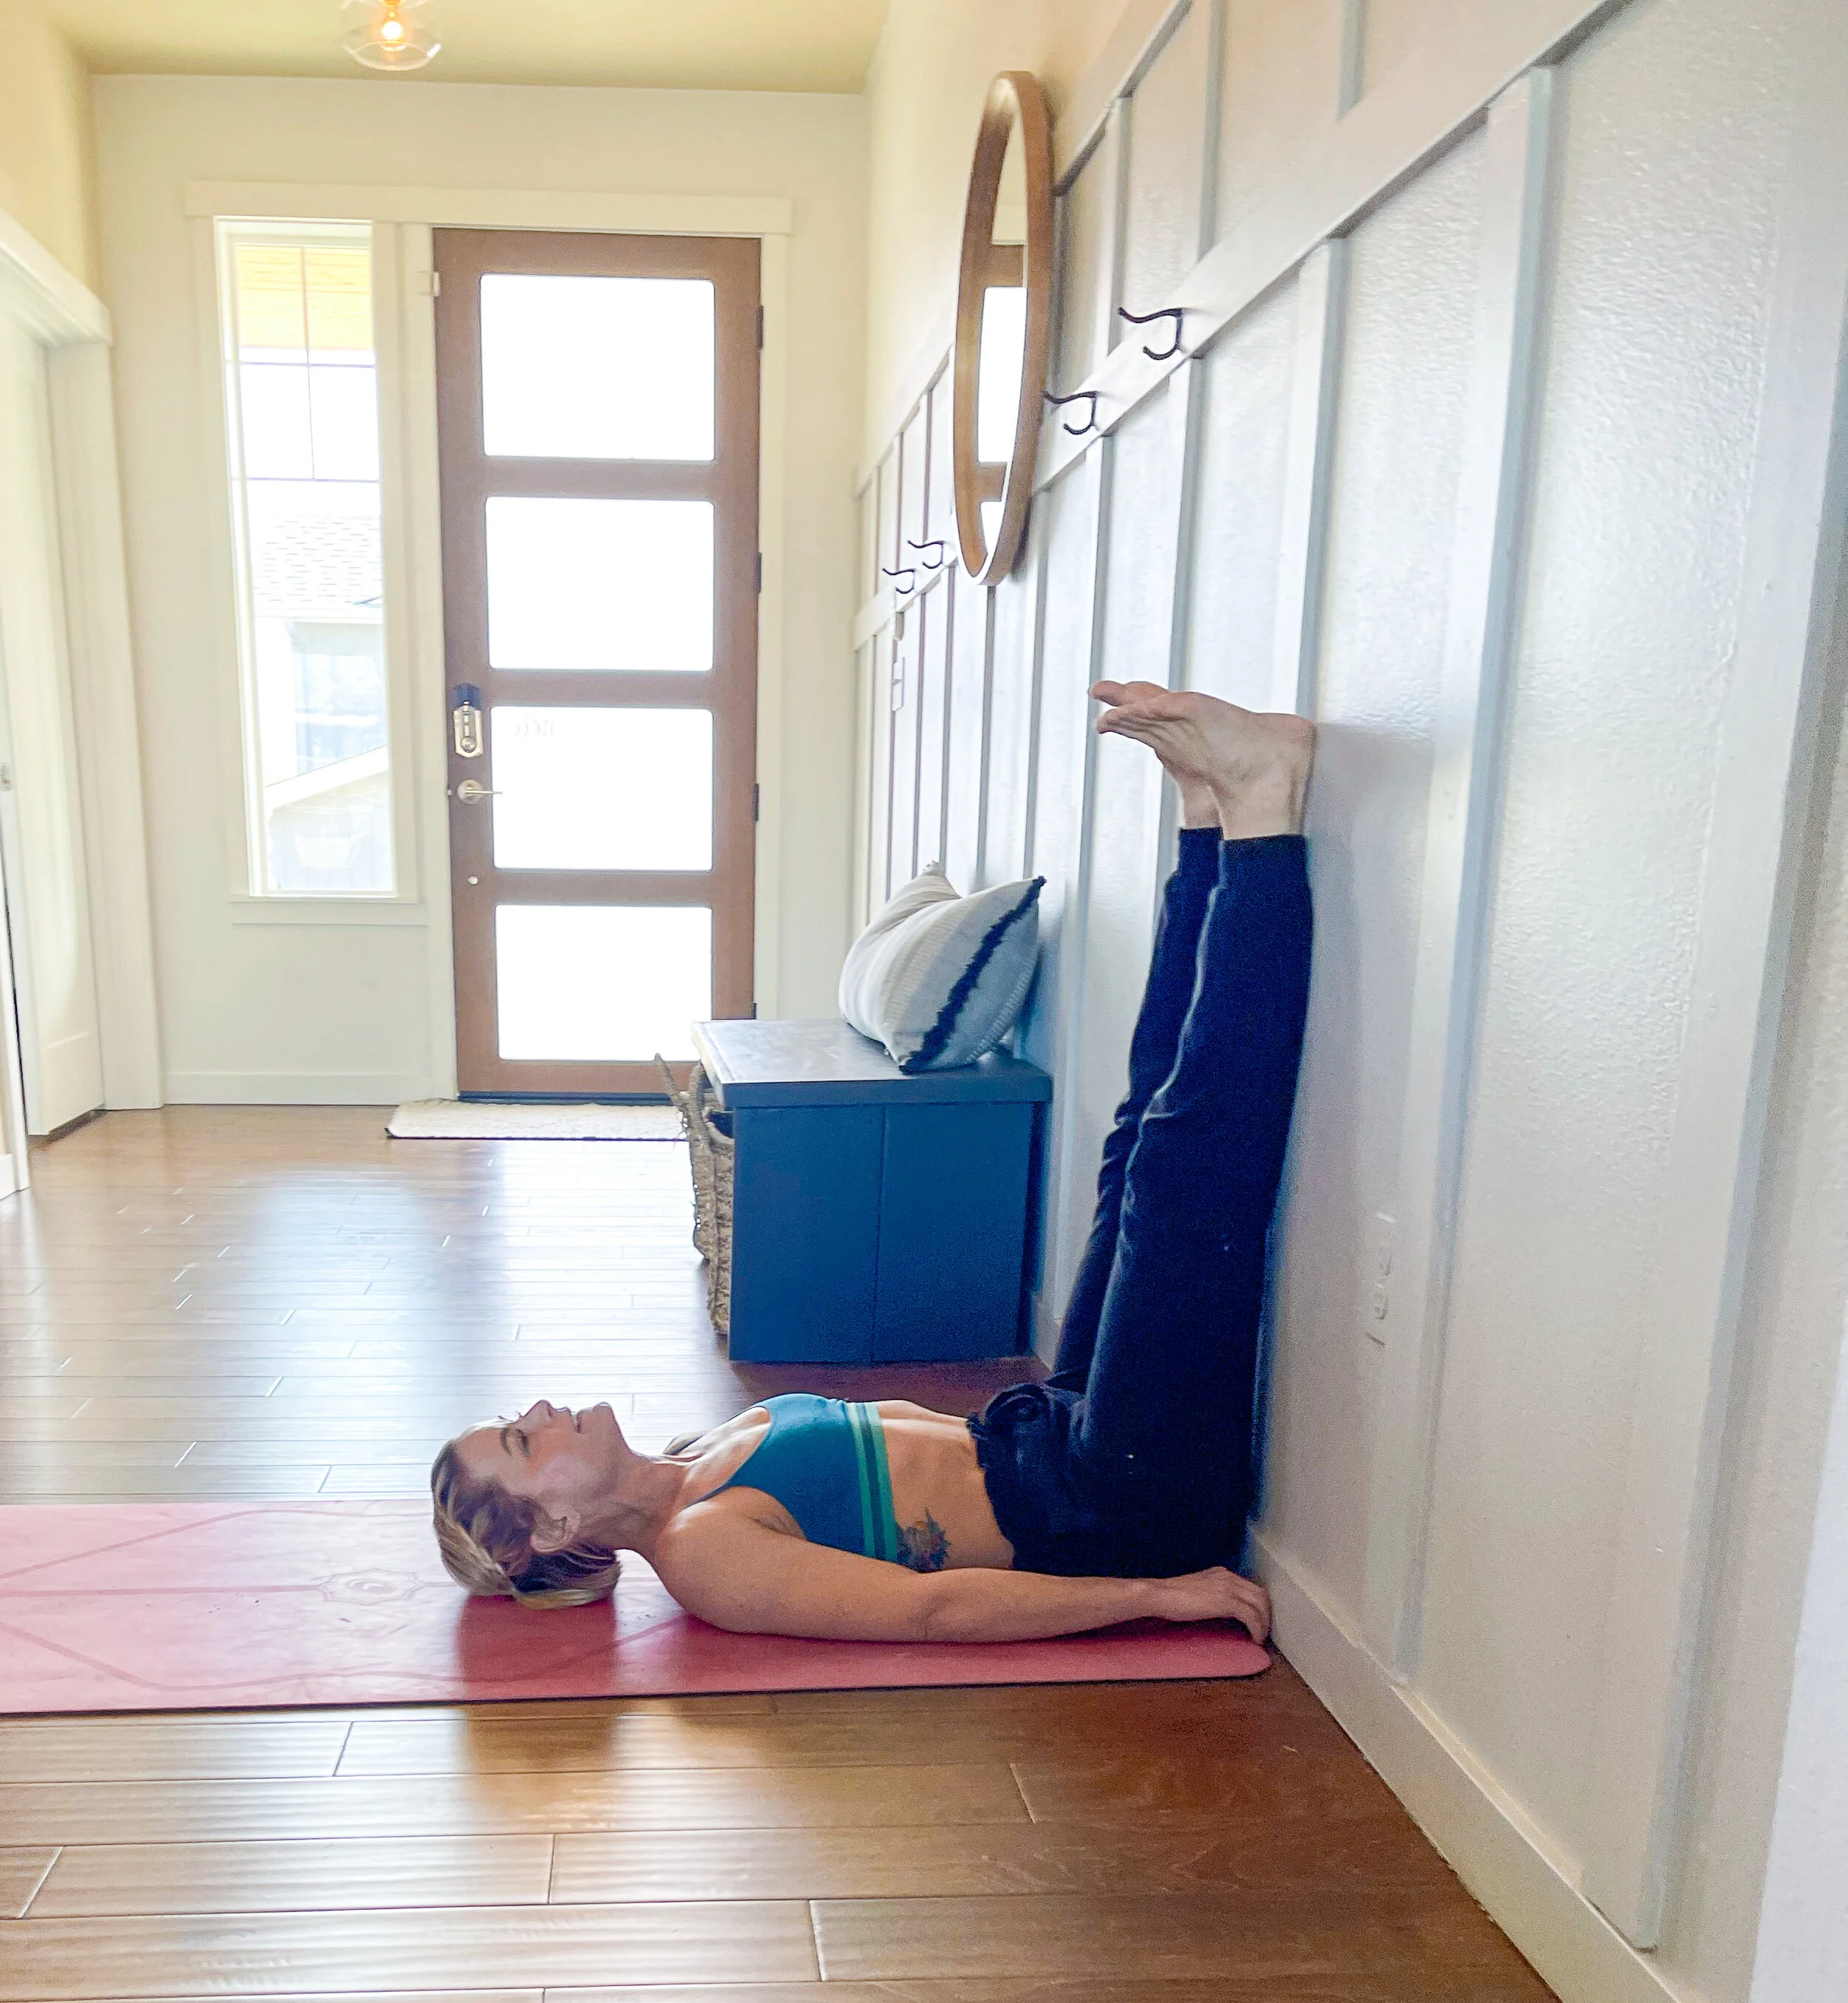
LEGS UP THE WALL
Set up your mat so the short edge is touching a wall.
If you are using them, please gather your props. The most common prop use is to place a folded blanket, or yoga bolster, under your lower back.
Lie down on your side with butt and legs touching the wall, where the floor and wall meet.
Turn onto your back and, as you do, bring your legs up the wall.
You can have your legs in a V-shape, or bring your legs together. Work to keep your legs straight and connected to the wall.
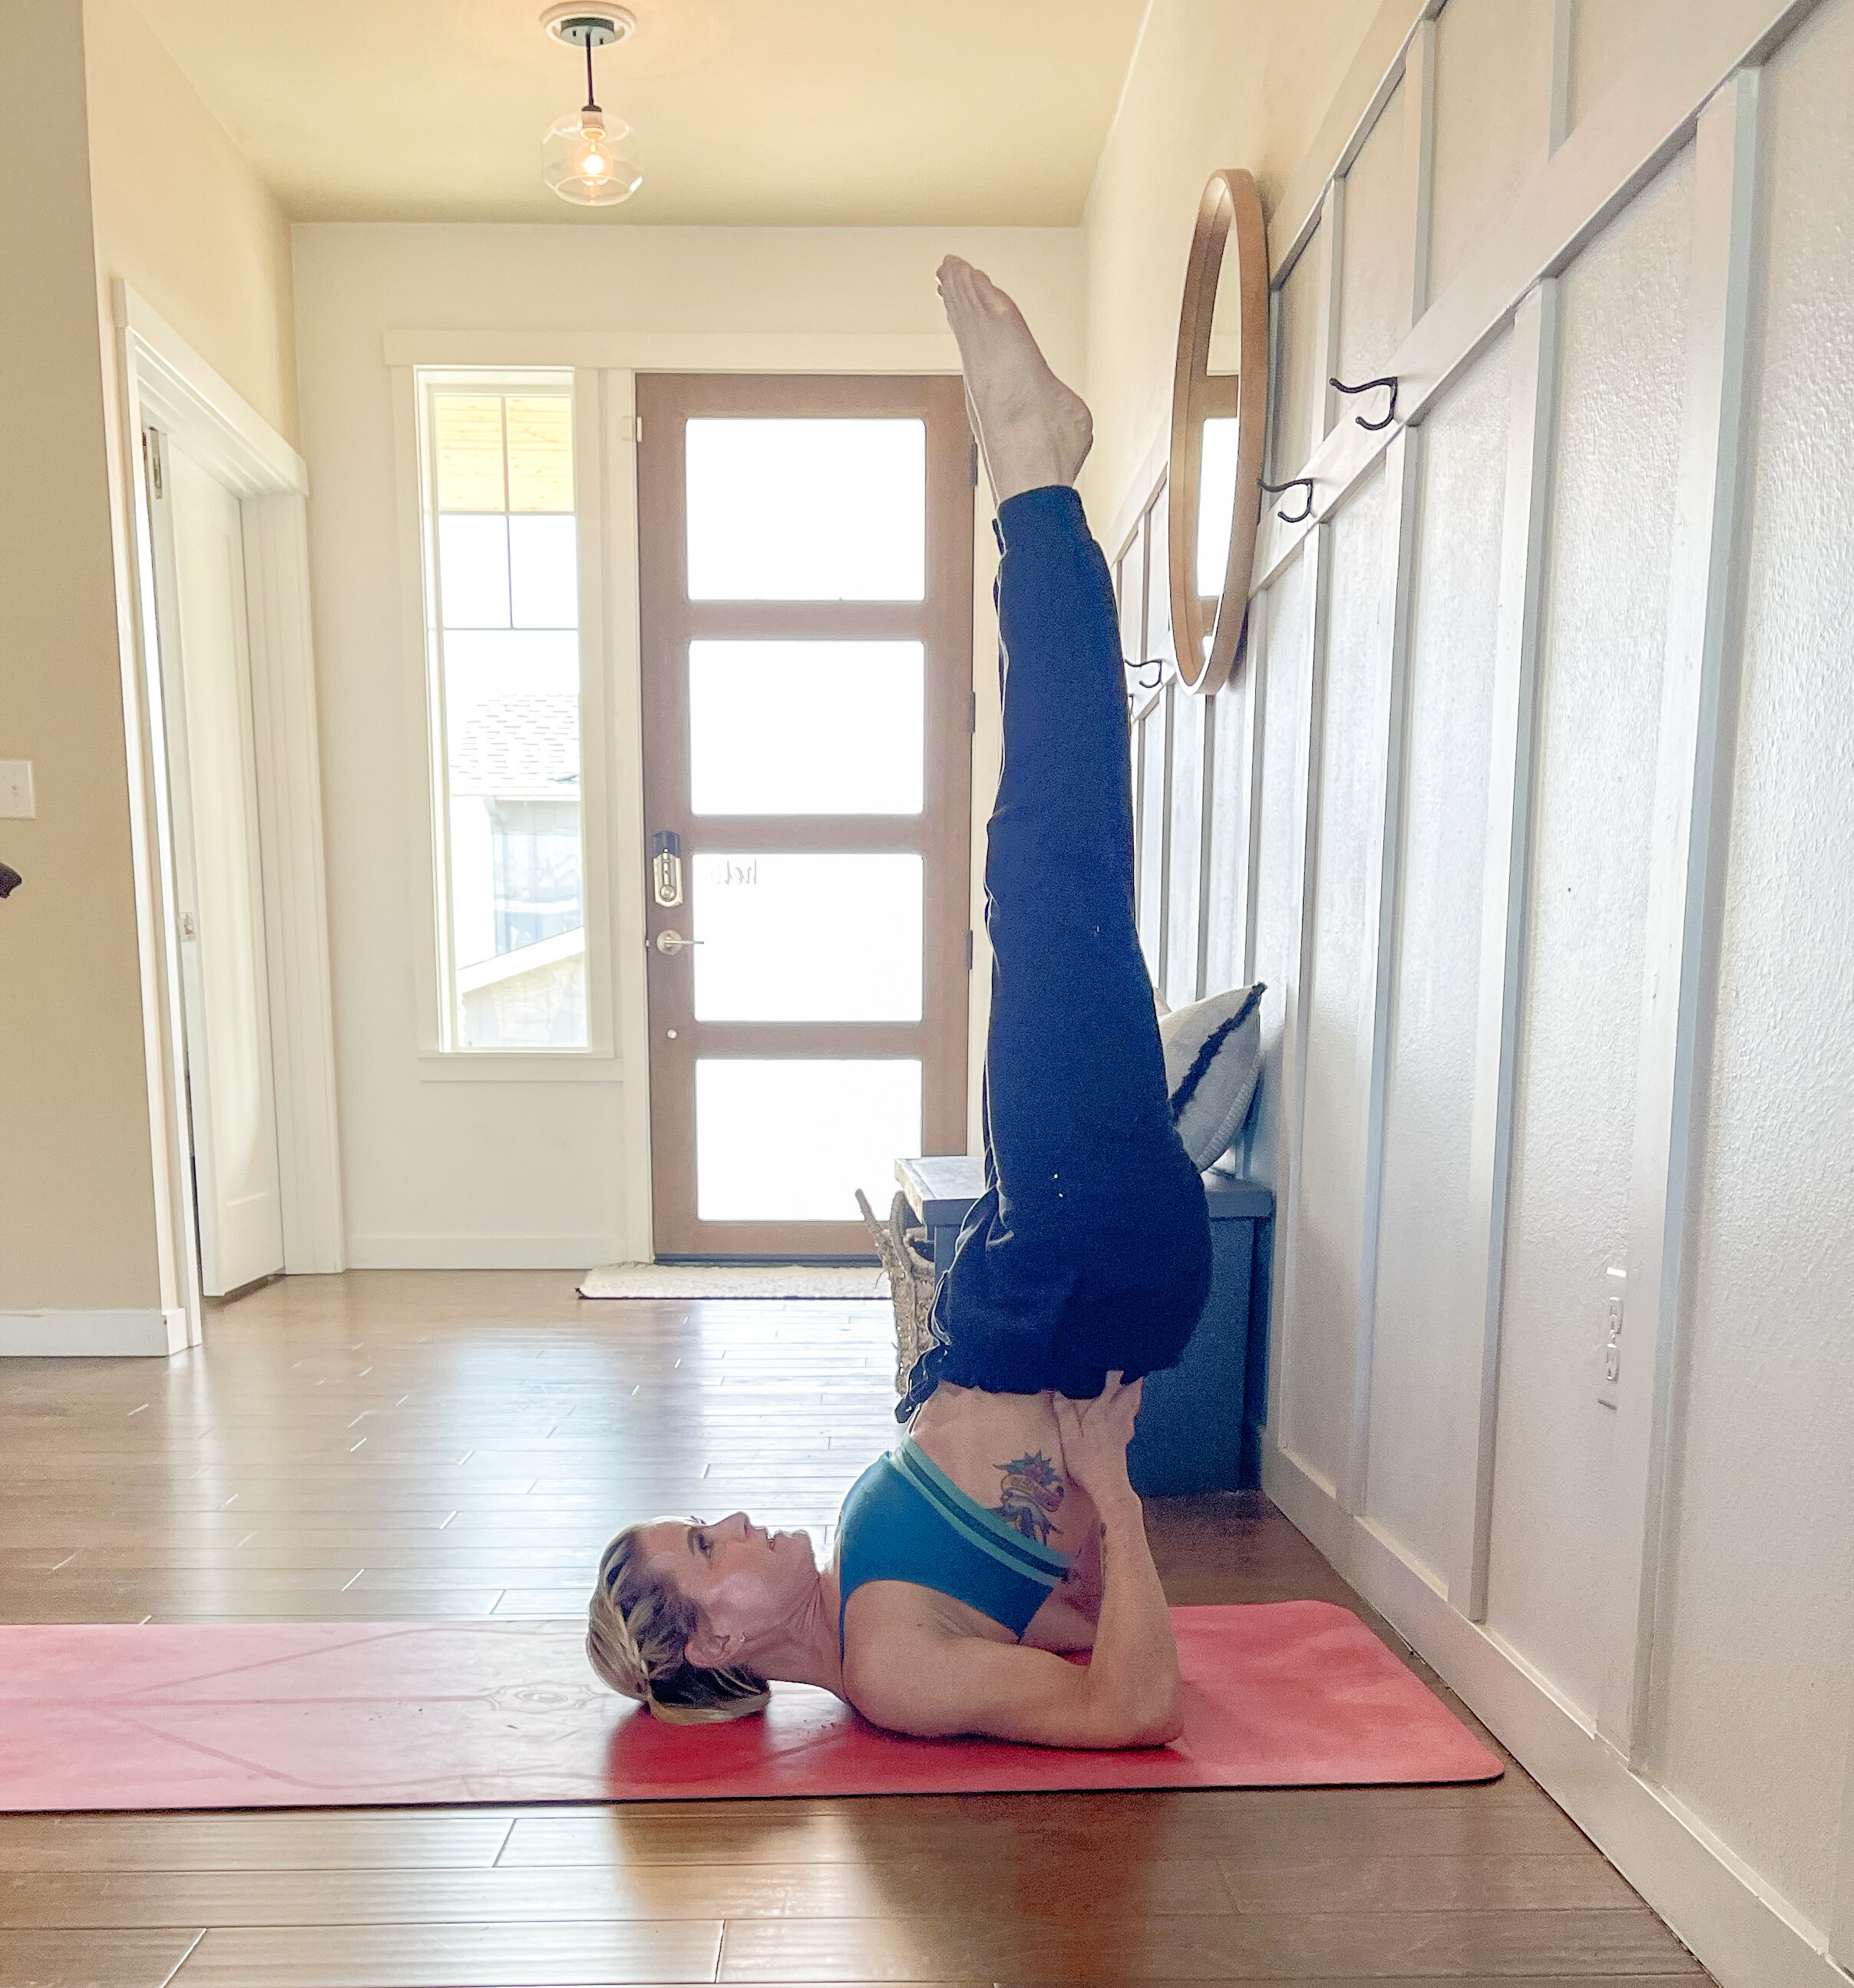
SHOULDER STAND
Lift your hips off of the mat coming into bridge pose and extend your arms onto the ground, palms facing down as if your hands could touch your heels. Press firmly into the palms using them as leverage to lift onto the balls of the feet and extend one leg up. Bend at the elbows, place your hands on your low back creating a shelf, and then extend the next leg up.
Once you raise the legs, don't turn your head to the side to look around the room, since you can injure your neck. Keep your gaze upward and your neck straight.
Lift up through the balls of your feet. Walk your hands further up the back for more stability. Feel the chest reaching towards the chin to support opening the upper back.
Move your hips toward the front of the room and your feet toward the back of the room to straighten the body. The correct alignment is with the hips over the shoulders and feet over the hips. Ask your teacher or a friend to help you determine if your legs are perpendicular to the floor.
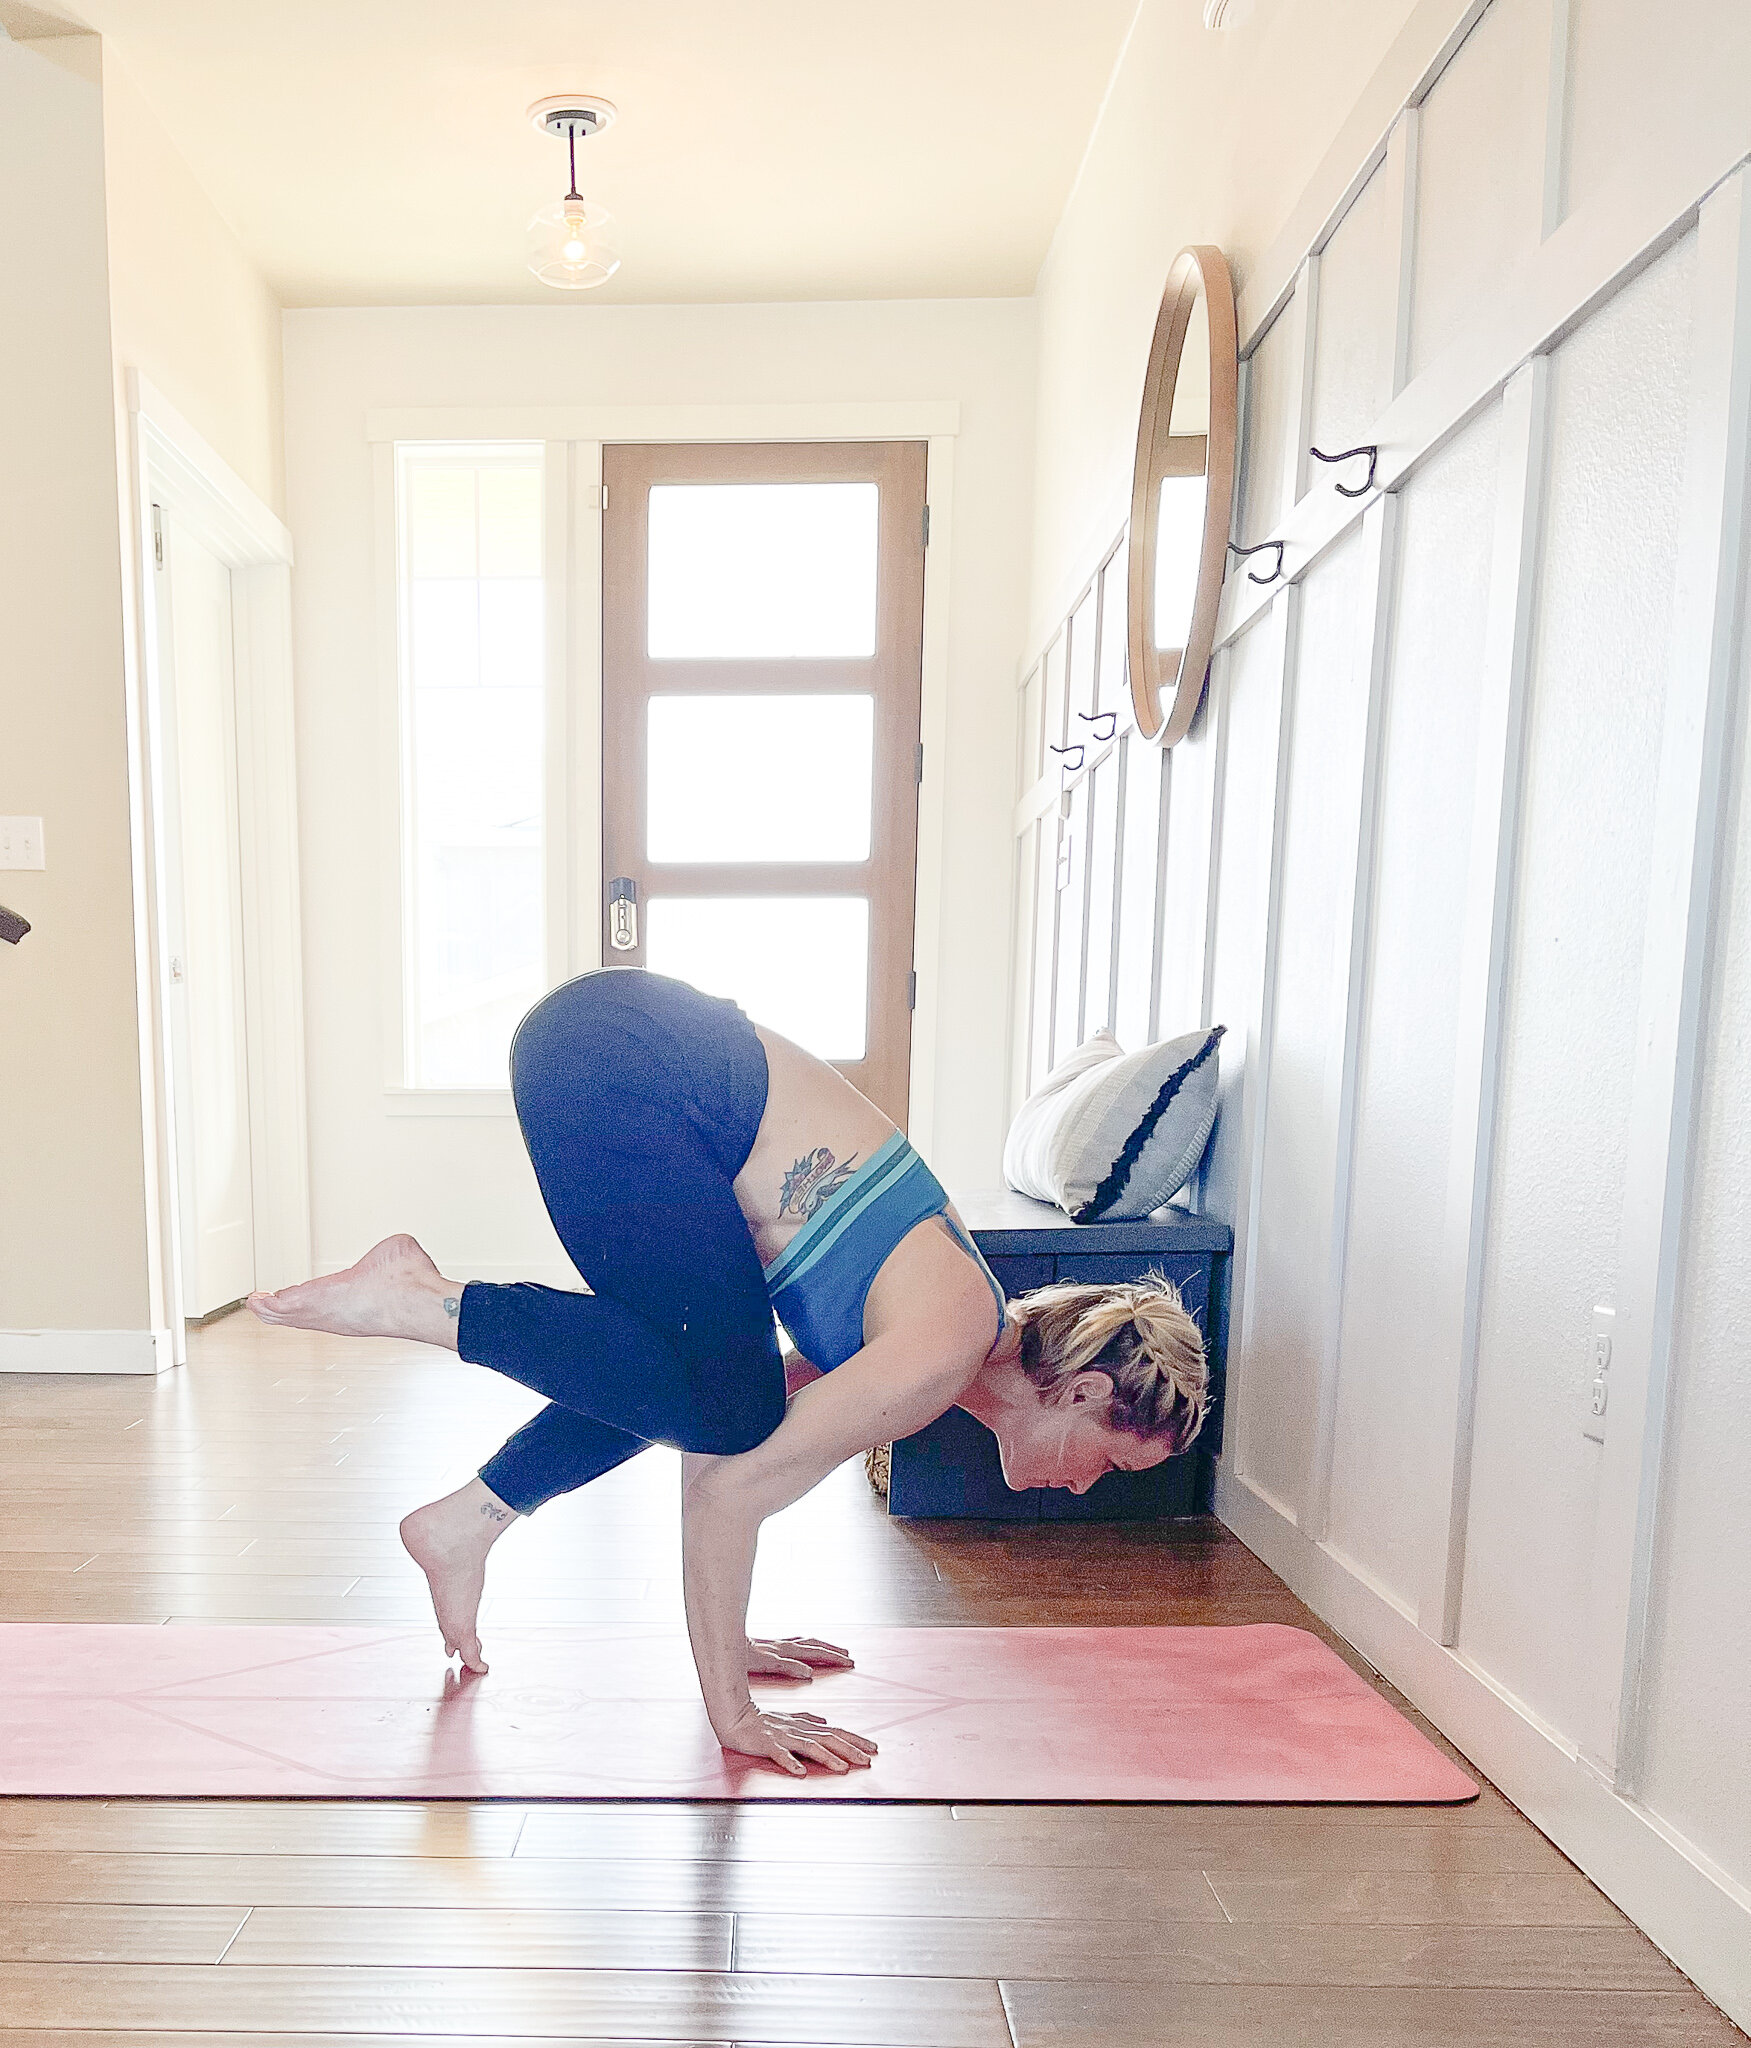
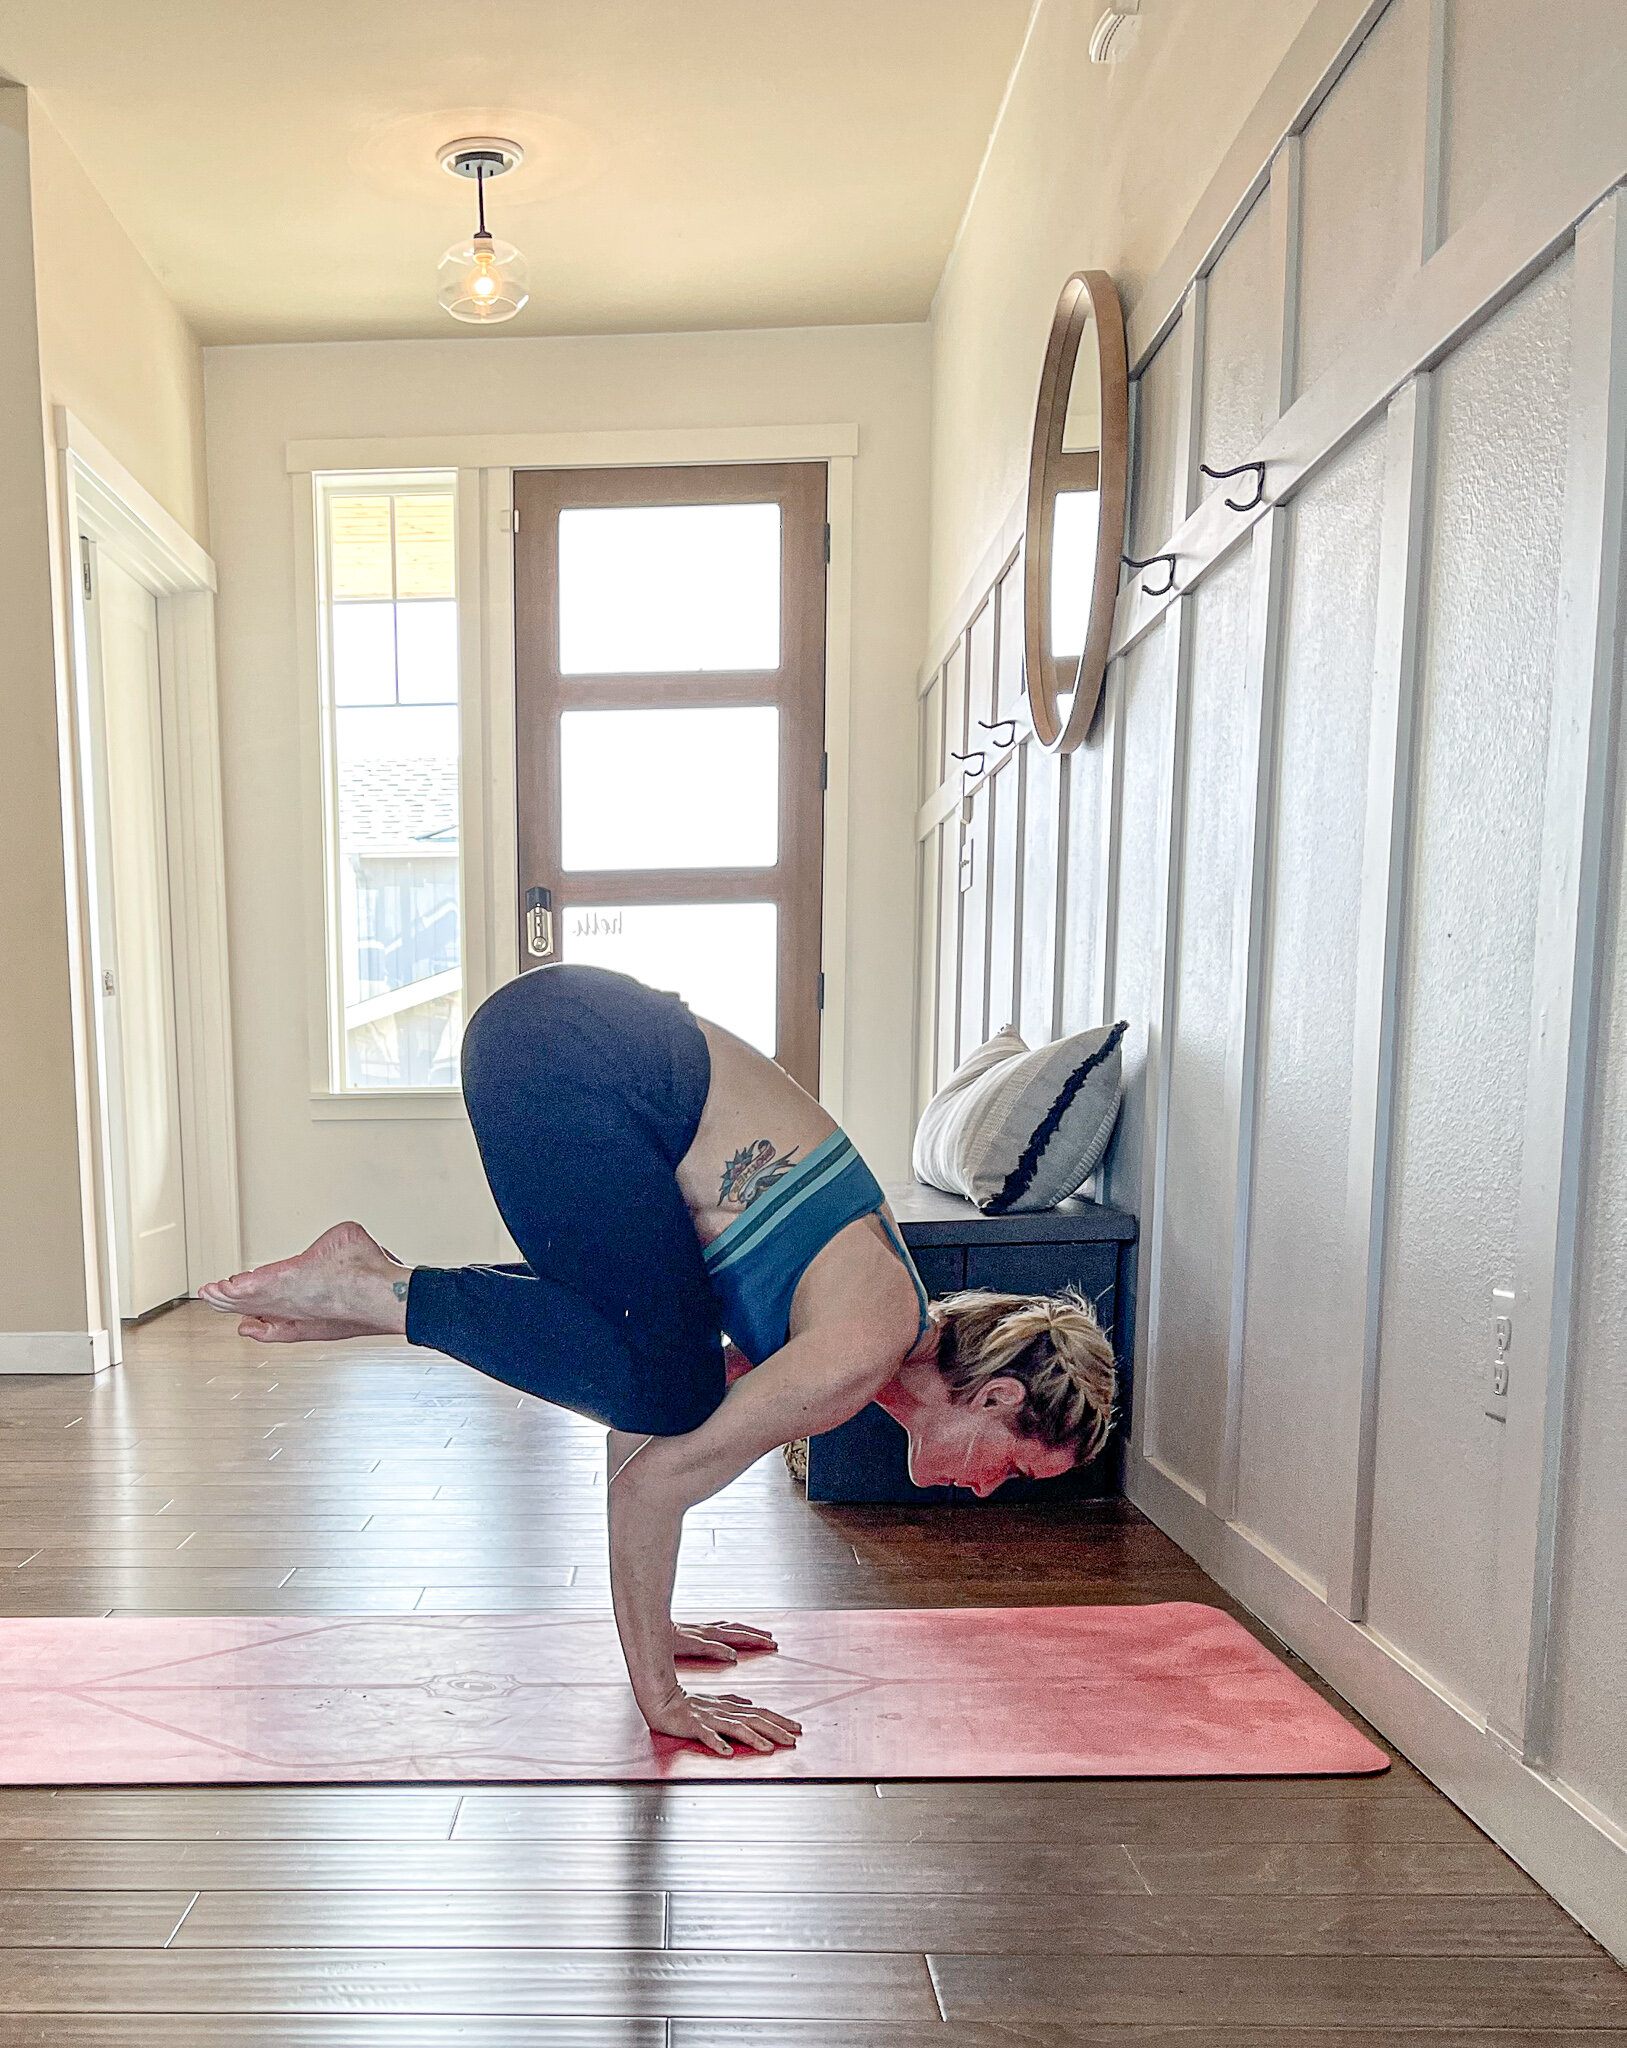
crow
Bend your knees slightly so that you can bring your palms flat on the floor about shoulder's distance apart.
Plant your palms firmly on the mat about a foot in front of your feet. Spread your fingers wide and press into the top joint of each finger.
Bend your elbows straight back. Don't bend them into full Chaturanga arms, but head in that direction.
Come up onto the balls of your feet and open your knees so that they line up with your upper arms.
Place your knees on the backs of your upper arms.
Begin to bring your weight forward into your hands, lifting your head as you go.
Come up onto your tiptoes, then lift one foot and then the other off the floor.
Engage the inner thighs for support while keeping the knees on the arms.
Hug your feet toward your butt.

tripod
Start from a neutral tabletop position, where your hands are directly under your shoulders, knees directly under the hips.
Slowly take the top of your head to touch the floor about six inches in front of your hands and lift your hips up and back so that your torso is almost vertically straight.
Engage your core as you bend your knees and shift your hips forward to take your feet up.

Headstand
From your tripod, gradually straighten your legs and you got it!

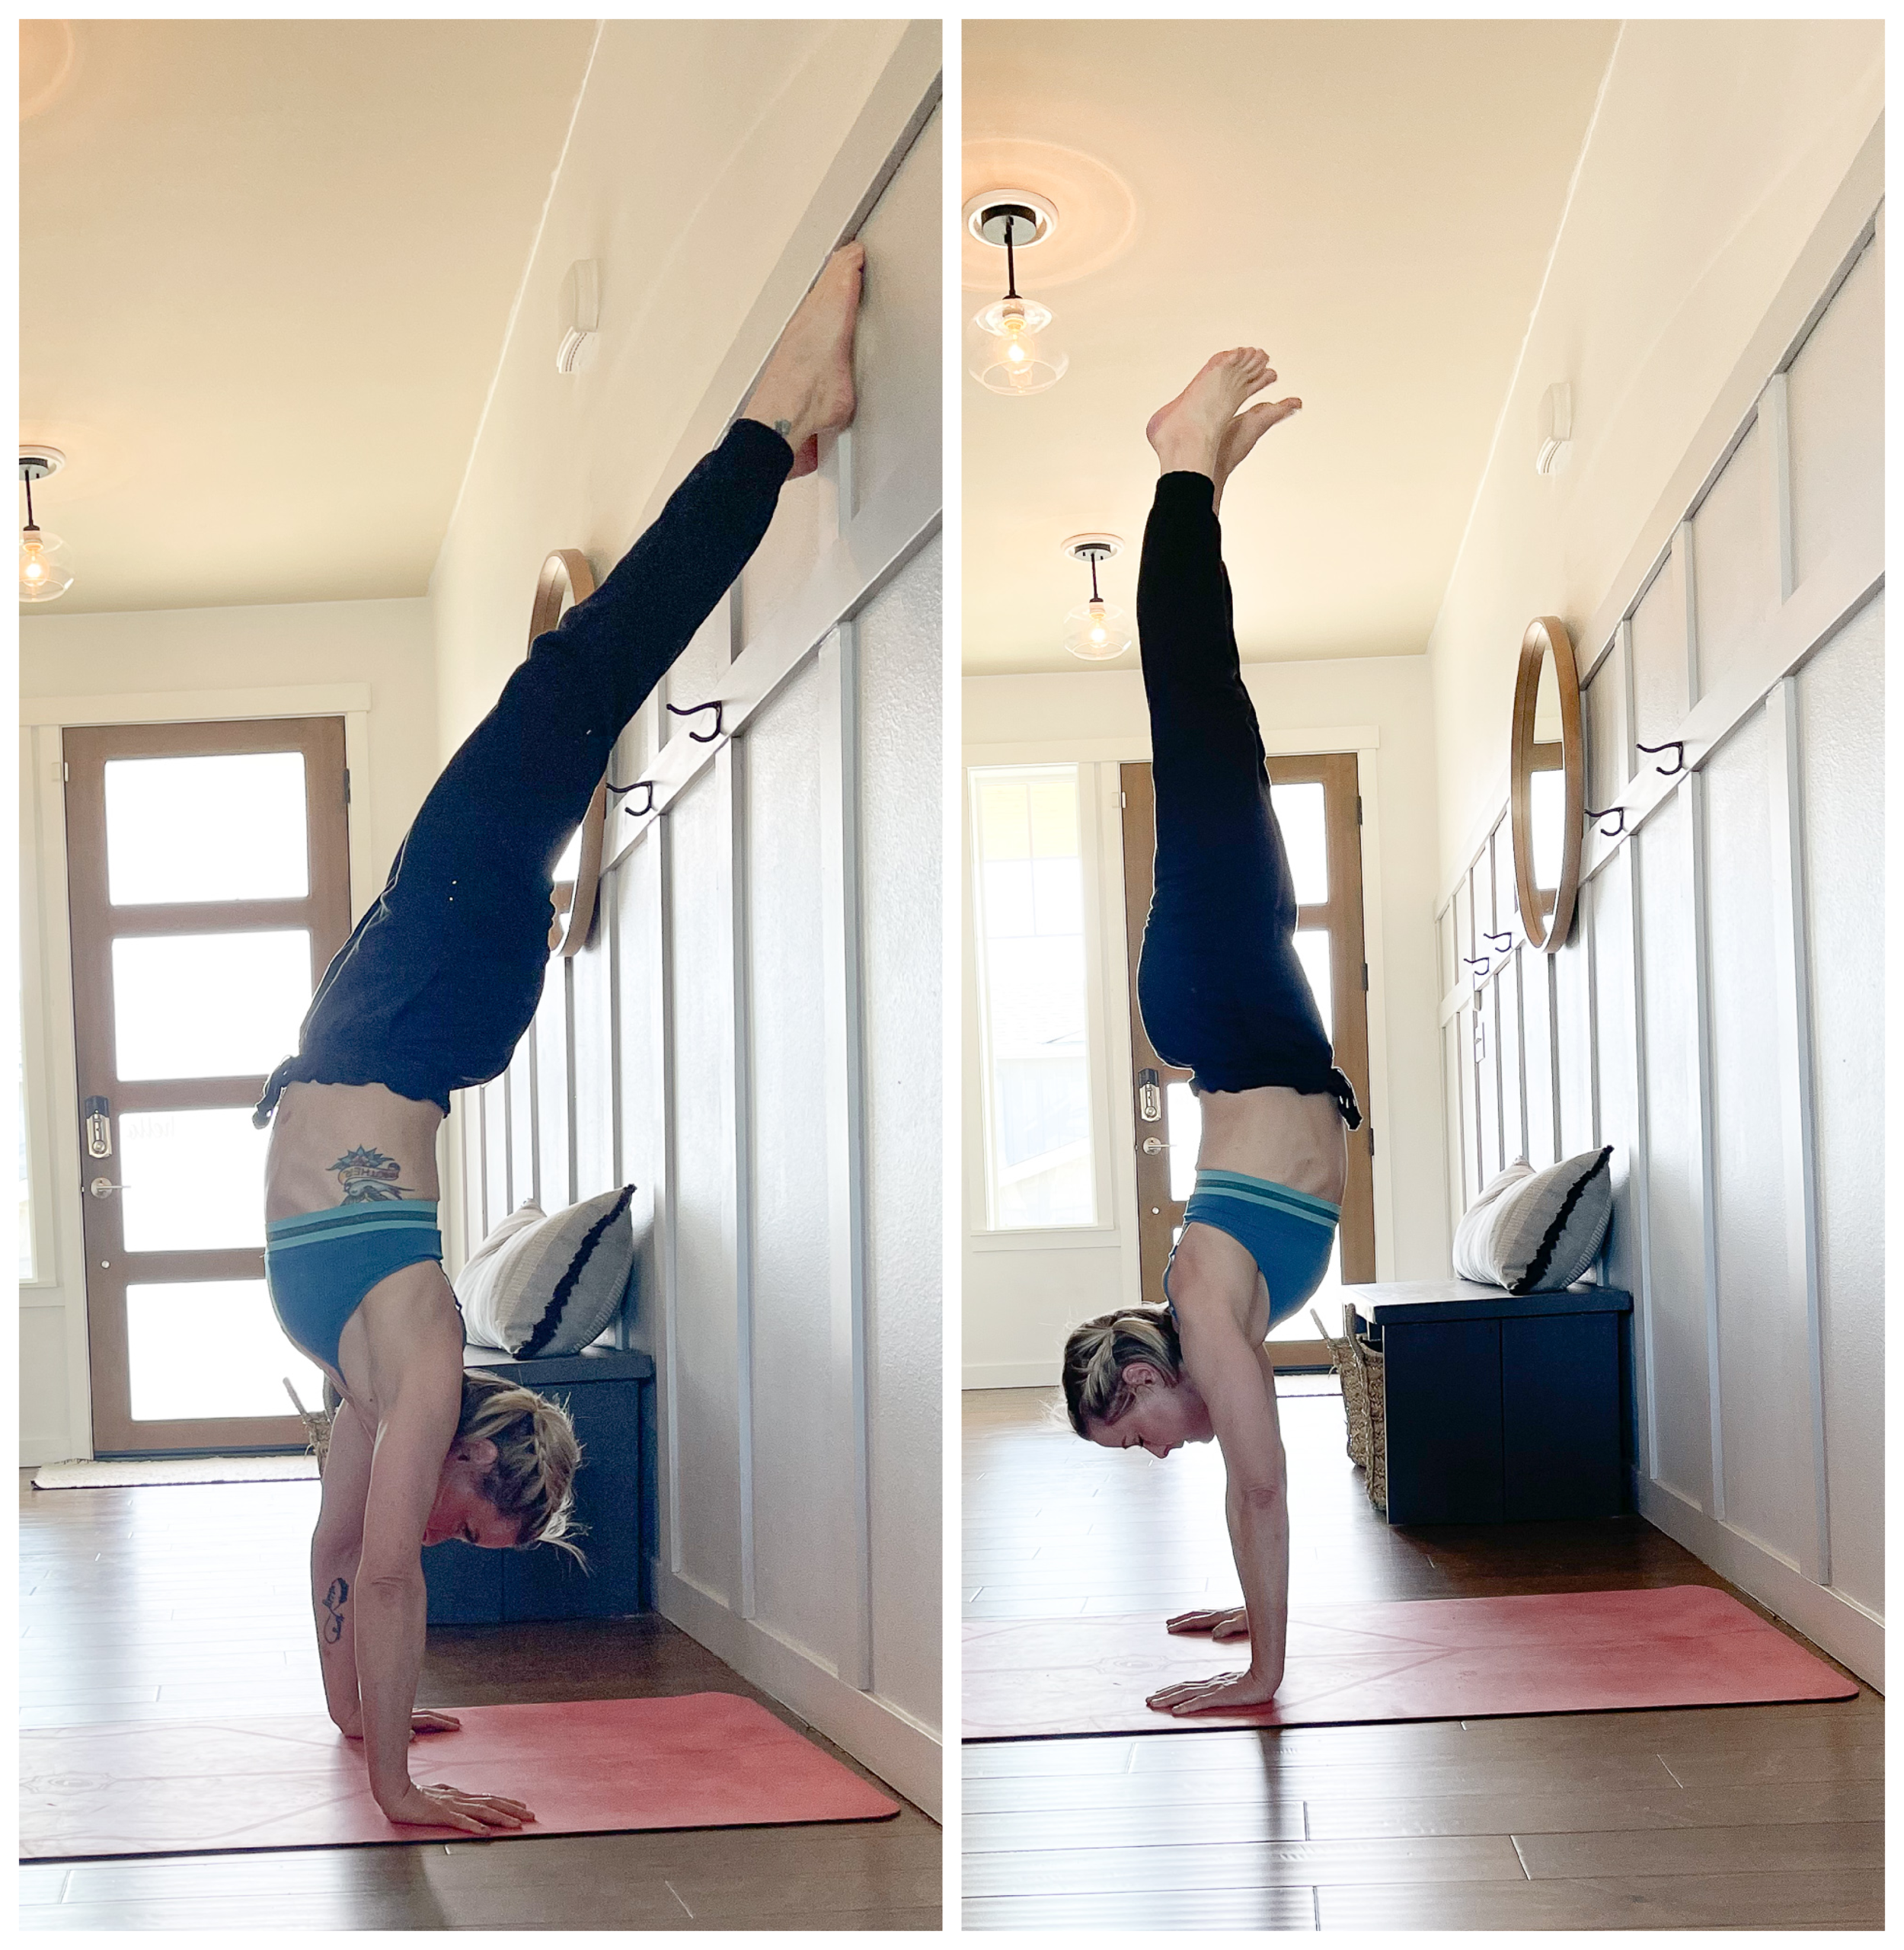
L-Shaped Handstand Step-By-Step
There are a couple of different ways to complete a handstand against the wall. One way is to obviously kick up while facing the wall, but I like to start with the L-shaped handstand because it helps to strengthen your shoulders and core while getting the feeling of being upside down. You can get used to doing this gradually, simply push forwards a little bit, then go back, then go forwards a little bit more until you find the balance point. Notice your feet also. They'll get lighter as you move closer to balancing.
Start with sitting away from the wall with your feet flat up against the wall.
Take your hands, place them on the floor beside your hips; and flip over into a Tabletop Position.
Lift your hips up and come into a short Downward Dog with your heels against the wall.
Now engage your core and take both feet to the wall to come into L-Shape.
Eventually lifting one leg at a time until you are able to hold the handstand.
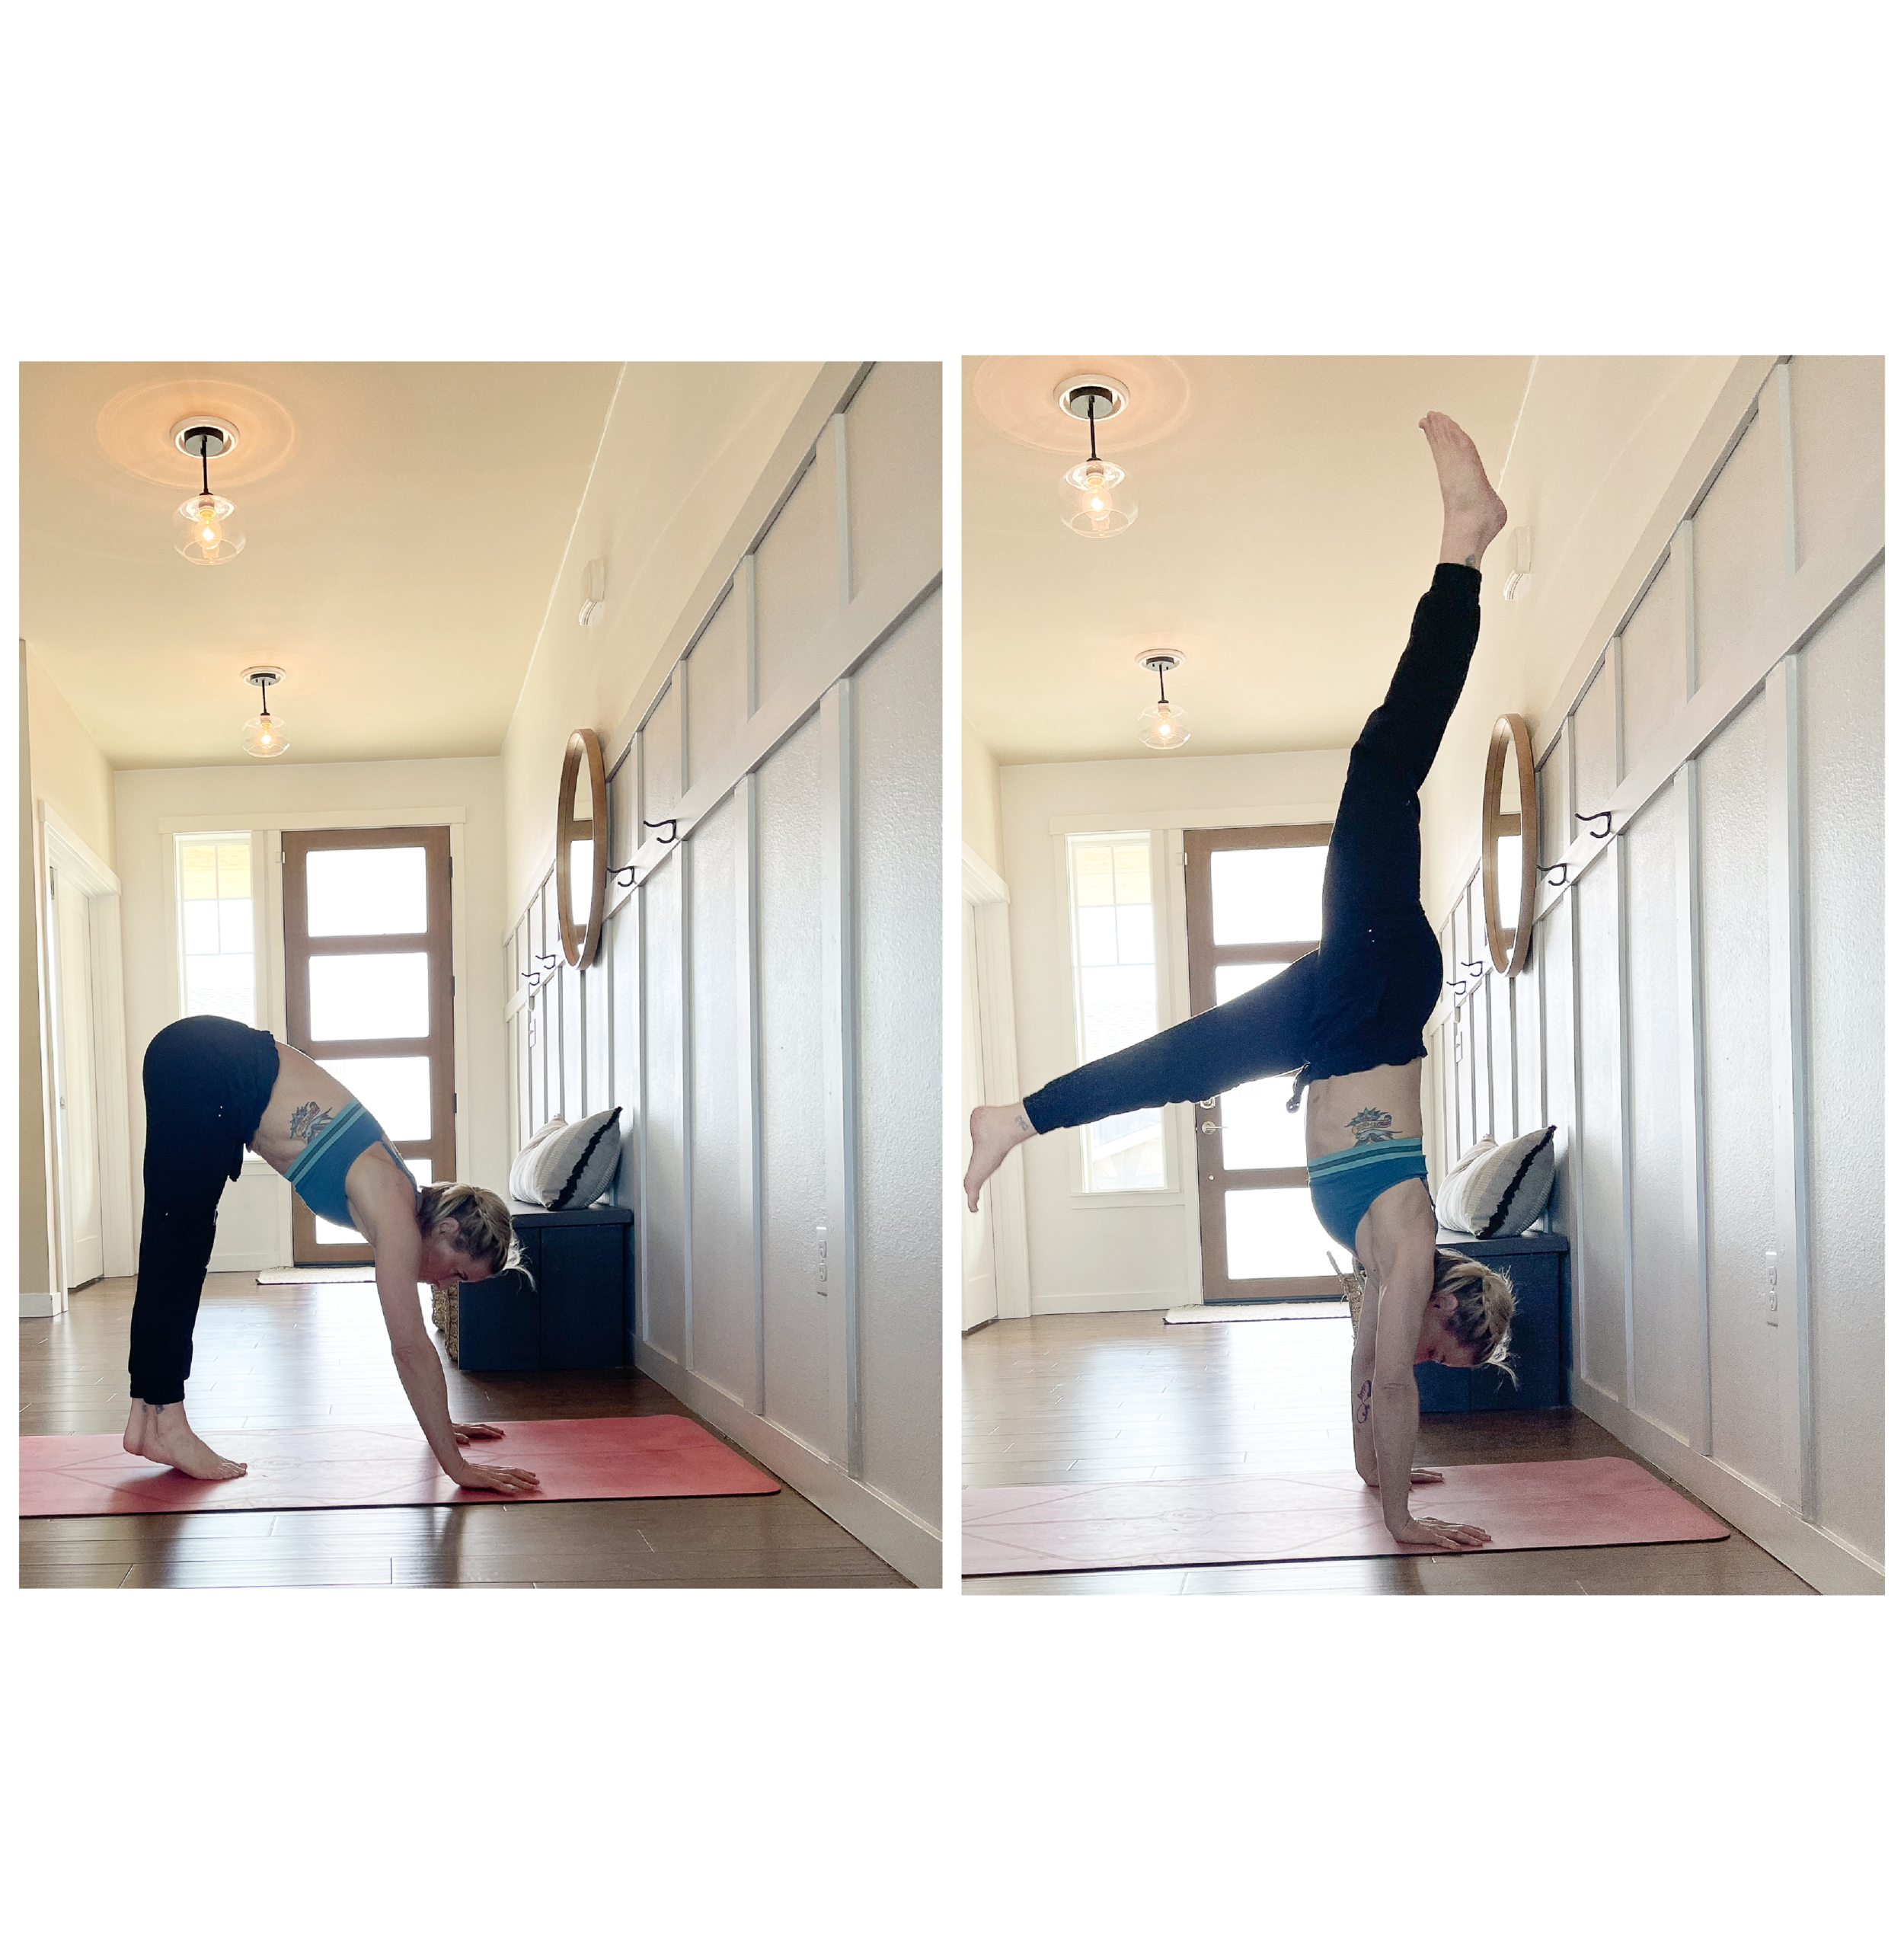
Kicking up to handstand against the wall
Step One:
Place your palms on the floor one foot away from a wall. Spread your fingers wide. Your hands should be the same distance apart as the distance between your shoulders. Straighten your arms and walk your feet back into Downward Dog Pose.

Step Two
Step one foot a little closer to the wall. This foot will act as your spring to kick up. Take a breath. On your exhalation, push up hard on your springing leg to lift both legs up and raise them up against the wall in front of you. Only your heels should rest on the wall. Your arms stay straight beneath you. Straighten your legs and lengthen them up the ceiling, tucking your tailbone in.
Step Three
You can practice hopping and kicking your legs up a few times. If you feel strong enough to do the pose but have trouble getting your legs over your head, then try coming into the pose in gymnastics style. You can stand up straight and tall, lifting your arms up high in the air. Then arch your back, look up, and in one fluid motion, you bounce forward as if you would do a flip, putting your hands on the floor one foot in front of the wall. Keep your legs straight after kicking up. Here the momentum of your hands falling down onto the floor will help you kick and launch your legs up over your head on the wall.
Step Four
Once you are in the Handstand, avoid arching your lower back too much. Pull your front ribs in closer to your spine and push your heels further up the wall.
I hope you and your little ones enjoy practicing some of these inversions! Feel free to reach out to any of the instructors at Spark if you have any questions!
Love and Light-
Cassy