Get Your Little Yogi Started With These Great Kids Yoga Resources!

Get Your Little Yogi Started With These Great Kids Yoga Resources!

“How can I help my kids reap the benefits I’m getting from yoga?” It’s a good question. As a parent, once you’ve seen how yoga has strengthened your body and calmed your mind, naturally you want to share those same benefits with your children to help them stay healthy, cope with stress, and cultivate inner strength.

What do you do first? How do you get them engaged? And how the heck do you get them to stay on their mats?

One way you can introduce yoga to your children is through a regular kids’ yoga class. But if one doesn’t fit in your family’s schedule, or the right teacher hasn’t appeared, no worries. To offer your kids a meaningful experience of yoga, all you have to do is make it a part of your home life.

Fortunately, you don’t need to be a children’s yoga teacher to start showing them fun and easy yoga activities that will have tons of great benefits for both them and you. Children are actually natural yogis. Their innate trust in others, combined with their lack of inhibitions, allows them to receive the teachings of yoga and grow from them in inspiring ways. Adults have a lot to learn from the way children receive yoga! If we can lead them there, they will not only benefit, but they will enjoy it immensely. First Let’s go over some of the benefits of yoga for our kiddos.

1. Yoga is non-competitive.

In today’s world, we hear so much about being the best and achieving the most. Yoga teaches kids that their bodies are different; different bodies do different things and all of them are okay. There is no one better or worse at yoga than anyone else; we are all just exploring our bodies and learning from them in our own way. Yoga is truly for every body.

2. Yoga teaches self-acceptance.

In the same way that it provides children an opportunity to learn something that is non-competitive, it also teaches kids to accept and cherish themselves as they are. Again, with society sending so many messages of inadequacy, yoga teaches kids to love themselves.

Learned young, this incredibly valuable lesson arms kids with the tools to fight off the increasing feelings of self-doubt that come during the teen years and beyond.

3. Namaste: The light in me sees the light in you.

Yoga teaches acceptance and tolerance of others. In practicing yoga, kids learn early in life that all living beings are to be cherished and respected as they are, thus helping to create more peaceful local communities and a more peaceful world in our future.

4. Yoga encourages healthy habits.

Any exercise program begun in childhood helps kids to remain physically active and healthy as a lifestyle. However, yoga takes that further by teaching not only the healthy habits mentioned above, but also a healthy approach to eating and the ability to calm oneself and focus the mind.

5. Focus. Focus. Focus.

We live in a world of distractions. More and more these days, kids seem unable to focus on anything for any decent length of time. Yoga can help with that. It teaches kids to be present, and to concentrate and focus on their breathing.

They learn how the breath can help them throughout the day, in any situation. They learn to focus on the pose by learning correct body alignment, and in so doing, learn to focus on their bodies and how they function—guiding each limb or part of the body through the nuances of the pose.

6. Yoga teaches calming techniques.

Young kids deal with frustration most typically by crying and throwing tantrums. When they learn proper, healthy breathing techniques and tools to focus the mind, they begin to learn how to apply those tools in their everyday lives and to react appropriately to any situation.

I know as an adult, I see improvements in this area in myself. Just imagine if I head learned more of these techniques as a child!

7. Children learn self-awareness through yoga.

Again, in guiding their bodies through the poses, children learn more about their bodies and what they are capable of. They learn more about their minds, and how they can affect not only their own attitudes and approaches to life, but also the attitudes of others.

They learn that they can achieve this through their own thoughts and how they choose to react to any given situation. This awareness of the body, mind and spirit, and of what can be achieved when all three work together, helps children develop into more confident, kind, responsible adults.

8. Yoga supports positive mental health in children.

When children learn to accept and love themselves for who they are, to see the good in others, to focus and calm their minds, and to be aware of their innate capabilities, they learn tools for resilience.

They are more likely to be positive and optimistic about life and their abilities, and will hopefully be less likely to succumb to anxiety, depression and other mental health issues that are so prevalent today.


Best Yoga Mats For Kids

Little Yoga Nation Yoga Mat

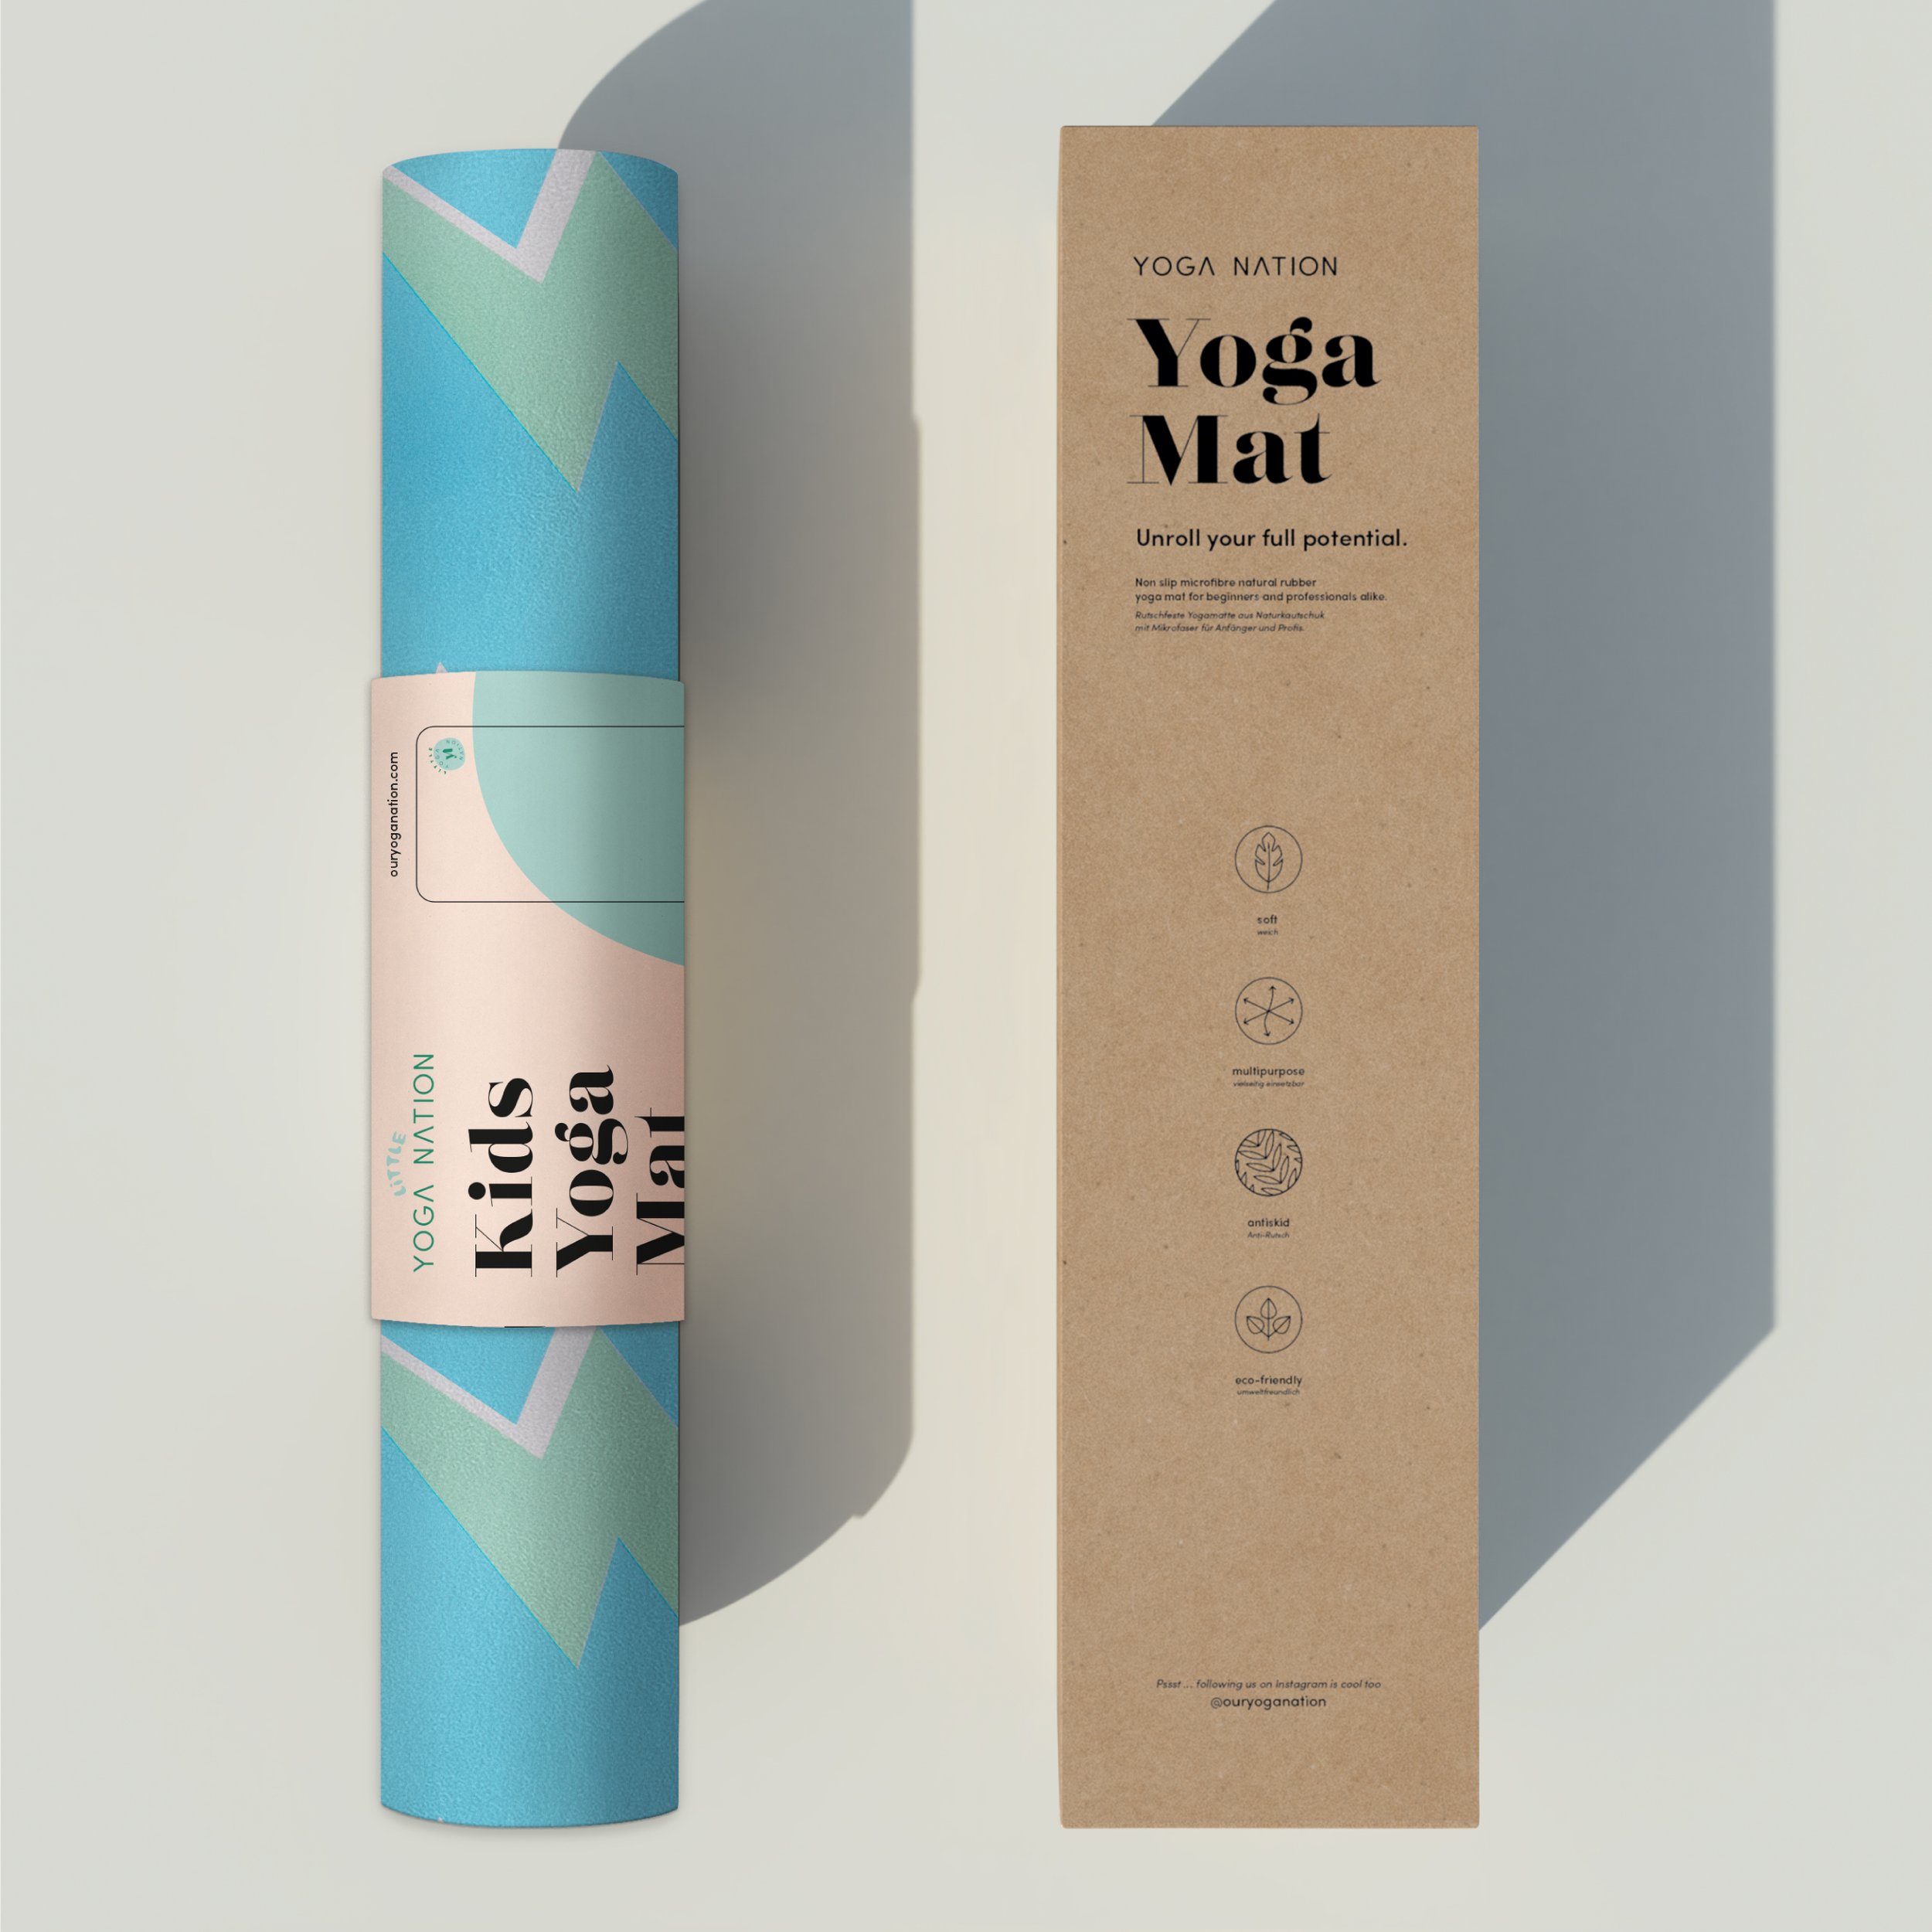
Children's yoga mat with a microfiber surface. Perfect for little hands and feet. The kids yoga mat from Little Yoga Nation combines good grip with the feeling of a velvety soft towel.

Made just for kids: cool designs for small yogis and yoginis of approx. 3 - 12 years and a size of approx. 1.50 cm. Perfect size for kids: 153 cm L x 61 cm W x 0.6 cm. Our designs will delight your little yogi.

Designed with love: Little Yoga Nation dispenses with plastic and relies on recyclable packaging made of paper and cardboard. We love yoga and we love our earth.

Super comfortable and functional: super soft surface combined with a perfect grip. Portable and easy to store.

Really Good Stuff Kids Yoga Mat with 24 Illustrated Poses

Strike A Pose: Printed with 24 adorable, instructive pose illustrations, this is the perfect kid, teen, and toddler yoga mat for beginners to follow along and learn every position. Not only is yoga fun, it also helps build strength and flexibility, which in turn can reduce your child’s chances of injury as they grow. Great for use at home or in the classroom, for a fun activity and coordination exercise for kids!

Encourages Calmness and Mindfulness: The perfect low impact exercise tool for toddlers, children & teens – Created especially for kids, this thick yoga mat with poses printed on it provides a wonderful outlet for kids to burn through extra energy, calm down, and feel rejuvenated.

Mindful & Co Yoga Kids Mats

Made with 100% recycled tree rubber, our Kids’ Yoga Mat features a luxurious soft microfiber suede surface and a beautiful cushioned surface making it a suitable and comfortable for their little hands and feet for practice, and also play.

Lightweight, bio-degradable (PVC free with no Phthalates) and hypoallergenic with a non-slip grip, these specifically designed Yoga Mats for Children are easy to clean and machine washable.

Adorned with fun, gorgeous and adorable Chloe Jasmine illustrations, they offer all the comfort and stability of their adult counterparts, simply smaller, making them the perfect size for your little humans to carry.

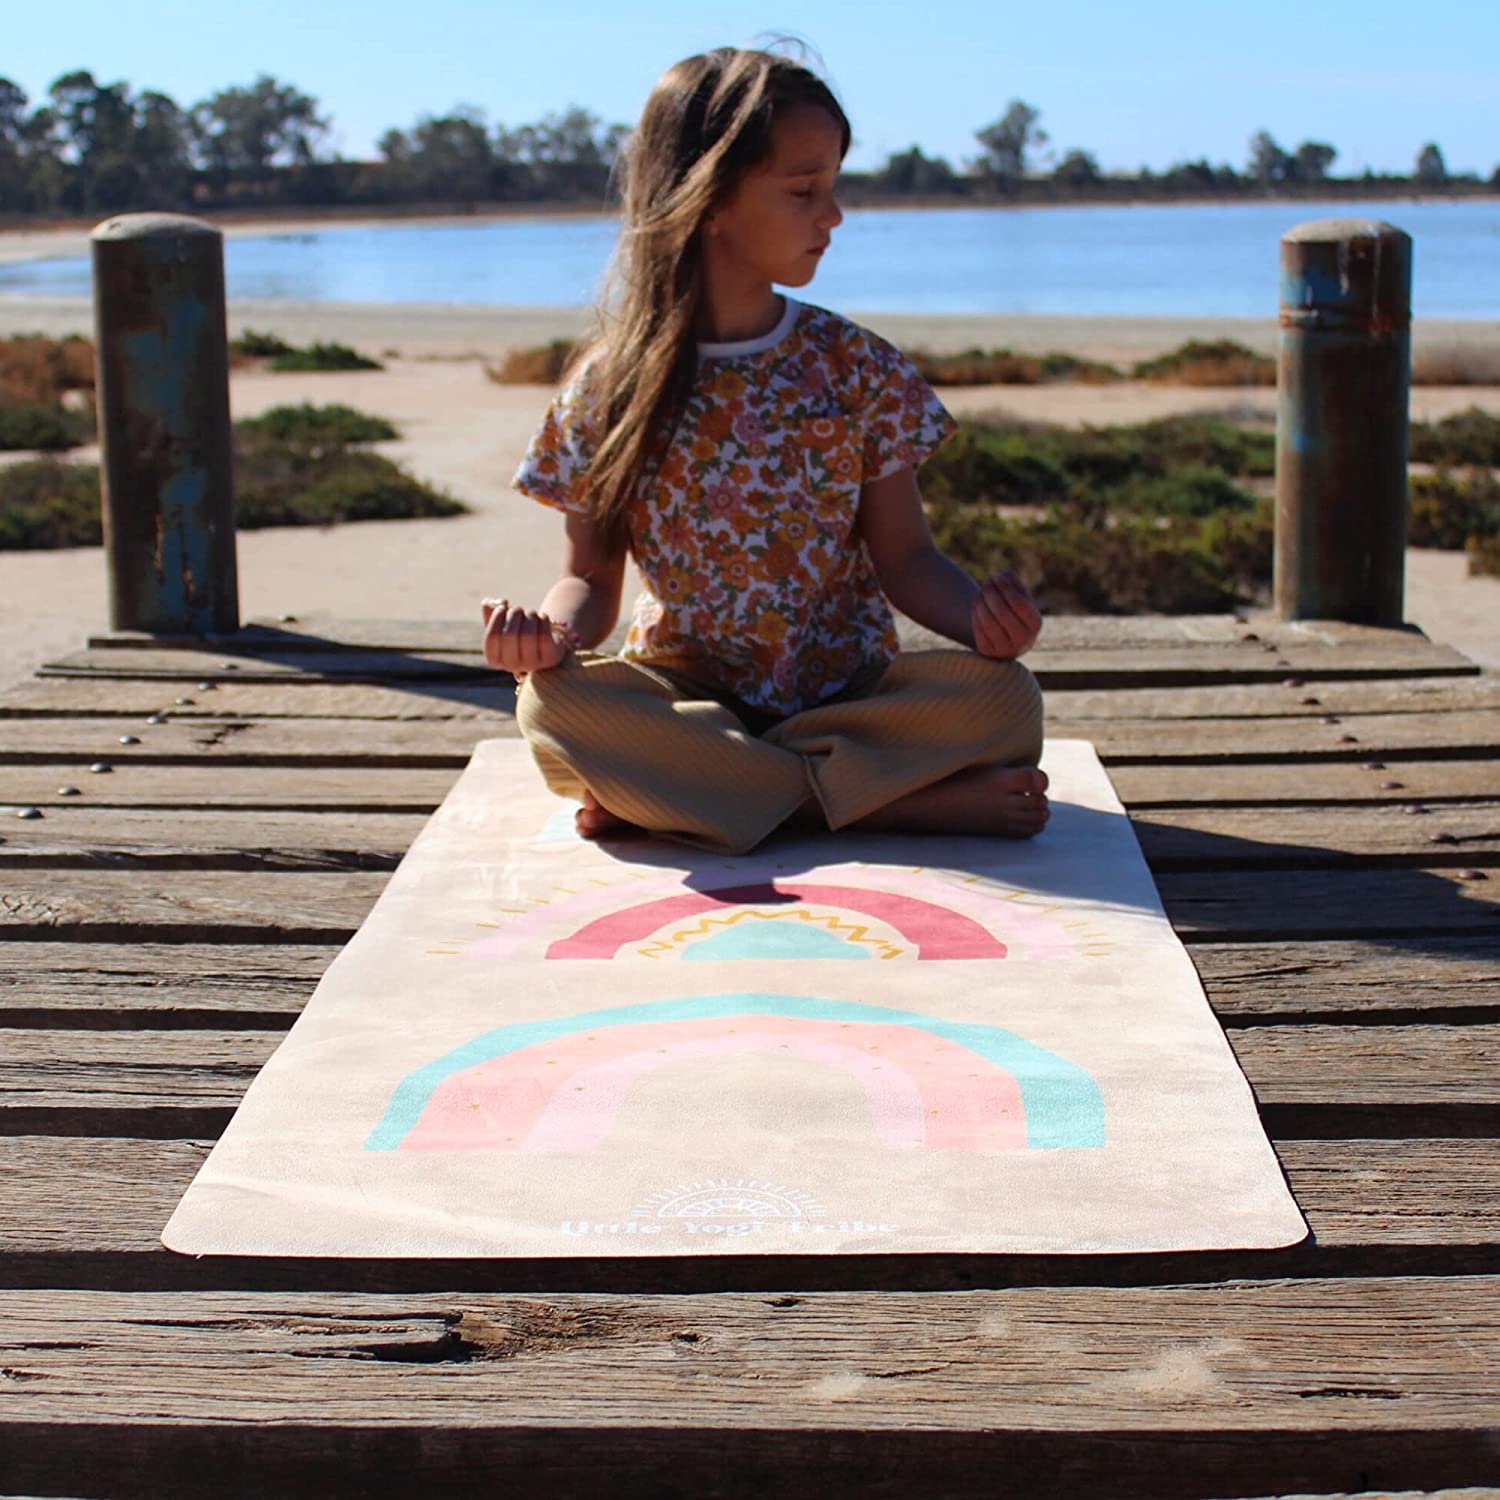
Little Yogi Tribe Eco Friendly Yoga Mat

Yoga Mat For Kids: Nurture healthy bodies & happy minds with their very own cute yoga mat! Our kids yoga mats are smaller than standard sized yoga mats perfect for little hands and comes with a free yoga carrying strap. Our small yoga mat is suitable for your toddler, child & pre teen.

Eco-Friendly & Non Toxic: Made of 100% natural tree rubber base and soft microsuede top our kids mat are biodegradable and recyclable. Our non toxic yoga mat is free of PVC, silicone, phthalates, chemical odours & other nasties.

Safe, Durable & Non Slip Yoga Mat: Our kid yoga mat will not slip. The 3mm rubbery base and fluffy jute microfiber texture on top means the mat is soft and gentle for your little one for yoga practice, kids exercise and play. Our high quality mats are super durable and tear resistant.

Easy To Clean: Our children’s yoga mat are machine washable or simply hand wash with mild detergent and water and hang to dry.

Kids Yoga/Mindfulness YouTube Channels to Follow

Cosmic Kids Yoga

Healthy videos made specially for kids - with a focus on yoga, mindfulness, stories and relaxation. Used in homes and schools all over the world. Interactive adventures which build strength, balance and confidence - and get kids into yoga and mindfulness early!Healthy screen time which gets kids moving, relaxing and learning simple lessons for a happy life.

Bari Koral

Bari is an award winning child and family recording artist and beloved kids yoga educator. Bari has trained over 20,000 teachers (and counting) to teach kids yoga based on her award winning songs and activities. Her songs for kids yoga, music and movement are used on a daily basis by thousands of children.

Rainbow Yoga Training

Rainbow Yoga offers some of the most well-known and loved yoga specialization teacher trainings in the world. Come and learn from us how to share with the world this unique style of interactive and fun yoga which celebrates life and brings people together. Step off of your individual yoga mat to explore and nurture your connections with friends and loved ones.

 Kidding Around Yoga

 Kidding Around Yoga is an international kids yoga organization that specializes in kids yoga classes and 3 day kids yoga teacher trainings. Music plays a big role in what we do, as we have 3 originally written and professionally recorded CDs full of insanely fun songs... some of which double up as activities and games! Our classes incorporate the entire science of Yoga, including breathing, stretching, meditation, and deep relaxation....mixed in with high energy exercise and tons of silly fun.

Kids Yoga/Mindfulness Podcasts

The Peace Out podcast for kids

The Peace Out Podcast created by educator, family supports practitioner, and yoga guide Chanel Tsang, is entering its fifth season. That means there’s already so much content you can go through to help you find exactly what your child needs. I appreciate that they focus on breathing techniques in every episode, but use different themes, like dinosaurs, forests, and space to keep even younger kids interested and engaged.

Bonus: the Peace Out website includes great supplemental resources and articles for parents in the show notes for each episode, to help keep the learning going, if a theme strikes a cord with your kids.

Like You Podcast

The Like You podcast (get the double entendre there?) is hosted by dad of two Noah Glenn, and offers a fun mixture of stories, affirmations, breathing exercises, and lessons on emotional regulation all in convenient podcast form. The episodes may be a little long for preschoolers, but I think grade schoolers and older kids can really benefit.

Relax and Be Happy podcast

The Relax and Be Happy is an especially good mindfulness podcast for younger kids who may not have the attention span for longer meditations. It’s hosted by Bari Koral — a family music artist who also teaches the Yogapalooza you and mindfulness course for kids, with music by Grammy-winning New Age artist Paul Avgerinos.

Best Day Yet Podcast

Best Day Yet Podcast  teaches mindfulness skills in a way that is fun, super positive, and engaging for kids, taking imaginative animal adventures and practice affirmations or mantras based on what is learned form  each animal. There are also even shorter, power episodes that teach breathwork and empowerment tools that your child can use throughout their lives any time things get hard.

Kids Yoga/Mindfulness Websites

Alo Gives

Alo Gives is a free, Scholastic-approved videos designed to be used in classrooms or at home to help introduce kids to the skills necessary to calm their minds and bodies, mute negativity and promote learning. You’ll find fun, inspiring yoga and mindfulness programs containing 5-minute videos as well as creative, thought-provoking printable worksheets.

Giving children of any age the skills to move and breathe helps them learn to confront challenge, amplify the positive, and be present, calm and clear-headed and in the midst of challenge, fear or frustration.

Kids Yoga Stories

Kids Yoga Stories yoga books, yoga and mindfulness cards, and other resources target children from ages two to eight. Engaging characters will get them learning, moving, and having fun.

Yoga stories combine easy yoga poses for kids with reading adventures that will help growing bodies and minds. Through creative storytelling, your children learn while acting out the stories through the poses, which help children develop awareness of their bodies and how they move. This improves motor skills and gives them an outlet for self-expression. Children who can express themselves often resort to meltdowns less often. The principles of yoga also offer self-calming techniques, which are great when it’s time to relax or go to bed.

Kidding Around Yoga

Kidding Around Yoga was founded by Haris Lender in 2009. Since we began spreading the love of Kids Yoga we have trained more than 10,000 people across the globe and as a result our teachers have delivered classes to more than 1 million children worldwide.

Their online program combines the principles of ancient yoga practices with a fun and engaging twist, which is coupled with a series of original music written and performed by our founder and many members of the KAY family. There are lots of classes and workshops available as well as a blog and podcast!

Kids Yoga/Mindfulness Books

1. Yoga for Little Kids 2. Breathe Like a Bear 3. Good Night Yoga  4. Breathing is my Superpower 5. Good Morning Yoga 6. Masters of Energy

I am sure your kids will love to learn about yoga as much as you have! Be sure to keep an eye out for our schedule at Spark for family and kids yoga classes too!

Namaste - Cassy


Valentine's Day Heart Themed Yoga

Valentine's Day Heart Themed Yoga

We have officially landed in February and with Valentines Day coming up love is in the air! Around this holiday, it is important to mention all the different ways we can express our love and kindness for others as well as ourselves. February is also Heart Health Awareness month. Yoga builds cardiovascular health, increases lung capacity, and improves respiratory function and heart rate. It also boosts blood circulation, builds muscle, and decreases inflammation. We also use our hearts to share happy and loving feelings with lots of different people in our lives, including ourselves. Valentine’s Day can be a great time to celebrate friendships, self-care, and family.

Yoga and mindfulness have a lot of benefits for kids to help them bring awareness to their bodies and emotions.

With focused awareness of our movement, muscles, and breath, we start to notice the different feelings and emotions held in our bodies. Today I am exited to share a breathing exercise, yoga poses and a mindfulness activity to help cultivate love and kindness in our children!


 Heart-full Breathing

Sit up tall with a long spine, and shoulders am . Bring your hands together in front of you, with your palms pressing together. Rub your hands gently to create a little warmth and energy. 

Then form the shape of a heart with your hands, with your thumbs pointed down like the tip of the heart and the tops of your fingers curled together. 

Hold that warm energy in front of your heart. Take a breath in, and reach your heart-shaped hands out away from you. As you breathe out, bring your hands back to your chest. Do this for several breaths, imagining sending your love out to others.

Heart Opening Yoga Poses

Heart opening poses offer a whole host of benefits. And there’s no better time than February to pay a little more attention to them. But what makes them so great? By the very nature of most of our lives, we end up holding so much of our stress and emotions in the tissues of our body. Through these heart opening poses, that extend, expand, lift, and add more space to the chest area, we help to remove some of the tension in the tissues in that area and thus encourage more circulation of blood, oxygen, and prana (our life force energy) through that area. With heart-openers, we may feel a release of all kinds of emotions.

It’s a good idea to follow backbends with forward folds, but only if you are going slowly and taking deep breaths. If you go from one to the other too quickly you can comprise your core and hurt your lower back.

Hold each pose for 3-4 deep breaths for the best benefits.

Standing Back Bend →  Forward Fold


Baby Cobra → Child’s Pose

Cow Pose → Cat Pose

Camel → Child’s Pose

 Bridge Pose → Legs Up the Wall Pose

Hearts of Love Activity

Materials Needed:

  • Construction Paper

  • Scissors

  • Glue Stick

  • Black Permanent Marker

  • Ruler

  • Markers or Crayons

  • Stickers and/or Magazines to Cut From

Start by cutting out large hearts from construction paper. Then use a black permanent marker to divide each heart into sections.  I used a ruler and made nice straight lines to divide our hearts into lots of sections. For younger children you may want to make fewer sections.  Older children can divide the heart on their own in as many spaces as they’d like. After that, it is time to get crafty! Have your child decorate each section of the heart with something they love. They can use stickers, markers, or pictures from magazines. Older kids may chose to write words in some of the spaces. Each heart is a beautiful reflection of the individual who creates it.

I hope you are able to try some of these activities to celebrate Valentines Day and Heart Health Awareness with your families! My kids really enjoyed it! Until next time…. Namaste - Cassy

Yoga Games to Get Your Kids Moving and Active

Yoga Games to Get Your Kids Moving and Active

Screen time has nothing on these awesome yoga games for your kiddos!!! We all know that it’s super important to get our kids moving and active. Playing yoga games is one way to do that!! So next time your kids say they are bored, get them up and moving while playing these fun games!

Body Shapes

Draw a shape on a whiteboard or a piece of paper and everyone must try to make that shape with their body. This can be done individually, in pairs, or in small groups. A fun challenge in pairs or groups is to see if they can make the shape while working together silently. Good figures to use are circles, lines, and certain letters.

Pose Challenge

This game will help children realize how all of their body parts have advantages and can make them stronger. Call out two different body parts that should be touching the floor or yoga mat and have them show that pose. For example “Two hands/Two Feet” could mean the children could show down dog, plank, cat, cow, standing forward fold, or a new pose that they invent. There are no wrong poses. It is just a fun way to get your body moving in different ways.

Mirror Mirror

Choose one partner to go first. The first partner will slowly move through a sequence of yoga poses or movements while the other person mimics the movements. After a couple of minutes switch roles so the other person takes the lead.

Yogi Says

One person is the designated Yogi, the others are the players. Standing in front of the group, the Yogi calls out yoga poses for the rest of the players to do. However, the players must only do poses that begin with “Yogi says.”

If the Yogi says, “Yogi says tree pose” then players must try to balance in tree pose. But, if the Yogi says, “Cat pose!” the other players shouldn’t move. Any players that move into cat pose are out.

The last player still in the game wins and becomes the next Yogi.

Try these games out, tweak them, add your own spin and have fun with them! I hope your kids love them as much as mine do!

Namaste- Cassy

Gratitude Garland - A Thanksgiving Craft For the Whole Family (Free Printable PDF Included)

Hi Friends! Can you believe it? We are already into November and we all know that this is the time of year to focus on being grateful! Gratitude is literally my FAVORITE. Why? Because there is a science behind how gratitude works to increase one’s happiness. Studies show that a regular gratitude practice actually decreases inflammation in one’s body. There are numerous studies that offer insight into how a person can improve their overall health and well-being through gratitude.

When kids practice being thankful on a regular basis, they experience psychological and interpersonal benefits like:
• They are generous towards others
• Feel less stressed
• Stay positive
• Feel happier
• Can perform better at school
• Not very materialistic
• Able to cope up with difficulties effectively
• They are able to focus better
• Fewer health problems

The bottom line:

Gratitude is believed to be one of the healthiest emotions that humans can practice.

So in the blog today I am going to share a gratitude activity that the whole family can do together!

GRATITUDE GARLAND

This is a fantastic Thanksgiving project for the whole family, and VERY simple to create. All you need are a few supplies and you’re ready to get started!

What You’ll Need

Gratitude Garland Printables (download below)

Scissors

Marker

Colorful twine or string

Fall colored washi tape or glue

How To Make A Gratitude Garland

Print – First, print off and cut out as many of our gratitude flags as you want.

Be Thankful – Start brainstorming all the things you are thankful for.

Connect – Place the string or twine down the middle, and glue or tape together.

Display – Hang and enjoy!

It doesn’t get much easier than that! With a few supplies and a little bit of time, you’ve got a super cute and meaningful craft! This Thanksgiving garland is perfect for all ages. My 12 and 14 year old daughters really enjoyed it! I hope you do too!


Wicked Fun Halloween Yoga Poses and Activities for the Whole Family!

Wicked Fun Halloween Yoga Poses and Activities for the Whole Family!

As the fall leaves begin to change color and the the temps become a little brisker, the back-to-school season swings into the Halloween season. The Halloween season is so great because it inspires creativity, we are able to get outside and spend time with our neighbors, it teaches the the law of giving and receiving, and of course the TREATS! Today’s blog is all about Halloween inspired yoga poses and activities for the whole family!


Halloween Inspired Yoga Poses


When I teach my kids yoga classes I always let the kids be creative with the poses. I don’t focus on perfection, and I always make sure it’s safe and fun!

Black Cat

Cat pose – Add a meow!

Scarecrow 

How to do it:  Start by standing in Mountain Pose. Extend your arms out to either side. You can then tilt your head to one side or another and wait for the crows to land!

Spider

Sit on your bottom with your knees bent and feet flat on the floor.  Place your hands on the floor behind your hips. Straighten out your elbows and lift your hips towards the ceiling.  Try walk like a spider!

Witch

Stand tall with your feet together.  Reach towards the ceiling as high as you can with both hands.  Slightly bend  both knees and hold  the position.  Think of yourself as a witch flying on a broom.

Jack-o-Lantern

Happy Baby Pose

Spooky Tree

Tree Pose – Sway side to side if you can, like a tree blowing in the wind.

Frankenstein

Stand with your feet shoulder width apart.  Reach your hands out to the side as far apart as you can. Now bring your hands in front of you. Take steps forward without bending your knees. Don’t forget to breathe!

Ghost

Start in tall kneeling.  Reach out to the side with both arms. Lean side to side like you are a ghost flying on Halloween night.

Googly Eye

Stand tall with your feet spread apart. Bend forward at the hips.  Look between your legs and make googly eye faces! Line the kids up or have them do it in a circle so they can see each other!

Harvest Moon

Moon Pose

Bat

Airplane Pose – Flap your arms like a bat flying through the Halloween night sky!


Halloween Inspired Yoga Activities

Freeze Dance

This is one of my all time favorite yoga activities to play with kids. Play some fun Halloween music like “The Monster Mash” or “Ghostbusters”.

Start by teaching the kids the 5 Halloween yoga poses listed above. Then, instruct them to dance to the music. When you stop the music, the kids will have to freeze in one of the Halloween poses.

What am I?

This game is all about being creative! The kids get to come up with their very own yoga pose based on either their Halloween costume or another yoga pose they’d like to create for Halloween. Each child will come into the middle of the circle and create a pose. The rest of the kids have to try to guess the pose/costume. Each child will have a turn and there is no wrong kids yoga pose!

Halloween Inspired Yoga Breathing

There are two different breaths I like to teach in a Halloween class. First is pumpkin breath. Inhale to fill your chest and round out the belly. Exhale and imagine that you are pulling out seeds from deep inside. These seeds are for things you don’t want to grow, like anger and sadness. The second breath is ghost breath. It’s a normal inhale through the nose, and then make a “Booooooo” sound on the exhale. You can be quiet ghosts, silly ghosts, opera ghosts, any kind you’d like.

Thanks for checking out some of these fun Halloween inspired yoga poses and activities. I hope you have a wonderful and safe Halloween! Trick or Treat!!!

Namaste Witches — Cassy

Chakras for kids using yoga poses and affirmations!

Chakras for kids using yoga poses and affirmations!

Here we are friends! Mid August, the weather has been great and the kids have been really enjoying it all! I don’t know about you, but I am BEYOND excited about the kids getting on that school bus everyday to that magical place where they get to learn and socialize and well, not be at home all day!!!

With lots of changes coming up for our kiddos, I though this would be a great time to go over the Chakras and how kids can learn to use the idea of Chakras, affirmations and yoga poses to feel more balanced when things might feel overwhelming.

So first off, WHAT EXACTLY IS A CHAKRA?

The concept of Chakras is rooted in ancient traditions of Hinduism but is also found in Buddhism and has made its way into spiritual traditions such as yoga. 

According to the concept, the physical human body does not only consist of bones, muscles, organs, and skin. It’s rather made up of various layers of energy fields surrounding the physical body. These layers are said to form the “subtle body”, also known as the “energy body” which holds all the energy that affects your mind, body, and spirit

The word Chakra is an old Sanskrit word and can be translated as ‘spinning wheel’. According to yogic beliefs, the human body has seven Chakras, which can be thought of as intersections of different energy channels. The life force, called Prana, travels through these channels or Nadis. Though the chakras are developing throughout your life, children and teens are not too young to begin to understand the basics concepts of chakras.

Each Chakra is responsible for different behaviors and values in life, such as security, communication, compassion, and love.

The yoga poses below, along with positive affirmations, correlate with each of the seven chakras.

The chakra yoga poses below can help children tune in to their unique thoughts, emotions and wellness. Chakra yoga poses including heart opening poses, back bends, and inversions—ultimately assist in energy flow throughout their bodies. Creating this deeper understanding of their wholistic selves can be part of building a healthy and well balanced life.

In this blog I will go over each of the seven Chakras, where they are located in subtle body, what color they are associated with and poses to tune into each Chakra. While practicing each posture encourage your child to repeat the affirmation, feeling the truth of the statement each time.

FIRST CHAKRA (ROOT)

“I AM SECURE”

tree pose

Just like a tree, your Root Chakra is what grounds you to the Earth, creating the foundation on which you build your life. The Root Chakra is associated with our feelings of safety and security, both physical and metaphorical. This includes your basic needs such as food, water, and shelter, as well as your emotional needs. Your Root Chakra is what causes your survival instincts, also known as the fight or flight responses. 

The first chakra sits at the base of the spine and is associated with the element of earth and the color red. Referred to as the root chakra, it is connected to courage and self-care as well as stability. The mantra that corresponds with this chakra is Lam (meaning seed) and and its vibration is believed to activate this energy center. A balanced Root Chakra creates the solid foundation that is necessary for connecting with and opening the six other chakra energy centers. 


SECOND CHAKRA (Sacral)

“I ENJOY MY LIFE”

warrior 2

The second chakra is called Svadhisthana or the sacral chakra. It is located in the area of the pelvis. It is known as the creativity chakra. Its color is orange and its element is water. Creativity and pleasure stem from this energy center. The mantra that corresponds with this chakra is Vam.


THIRD CHAKRA (Naval)

“I AM CONFIDENT”

BOAT POSE

The third chakra is called Manipura, which means “lustrous gem.” Manipura is the original Sanskrit name for the Solar Plexus chakra. Located around the navel in the area of the solar plexus and up to the breastbone, it is a source of personal power and governs self-esteem, warrior energy, and the power of transformation. The Manipura chakra also controls metabolism and digestion.

When you feel self-confident, have a strong sense of purpose, and are self-motivated, your third chakra is open and healthy. If you're experiencing chakra imbalance, you can suffer from low self-esteem, have difficulty making decisions, and may have anger or control issues. This means that your solar chakra is blocked and therefore cannot achieve its full potential.

In order to understand the chakra, there are some key details that we must understand first. These include:

  • Element: Fire is the main element of the solar plexus, or Manipura chakra. The element is meant to ignite your inner fire and strengthen your digestive fire.

  • Color: The color of the Manipura chakra is bright yellow, like the sun.

  • Location: The solar plexus is located around your navel area of the body near your upper abdomen and breastbone. Due to its location, it is also connected with the digestive system. The solar plexus is the third of seven major chakras in the body. This area of your navel must be open in order to feel the self-confidence and sense of purpose that you wish to achieve.

Purple Pentagon Worksheet (2).png

FOURTH CHAKRA (heart)

“I AM KIND”

cobra pose

Perhaps the most familiar chakra is the heart chakra, Ahahata. Its color is green and its element is air. It is deeply associated with love, compassion, forgiveness, and peace. The mantra that corresponds with this chakra is Yam.

  • In Balance: When energy flows freely, you will experience compassion, love, and acceptance.

  • Too Much: If you are experiencing jealousy or feeling clingy, you may have too much heart energy.

  • Not Enough: Signs that your heart chakra may be blocked or low in energy include feeling shy or lonely, or experiencing an inability to forgive.


Purple Pentagon Worksheet (5).png

Fifth Chakra (throat)

“I am confident”

Bridge Pose

The Vishuddha or throat chakra is your center of expression, associated with speaking your truth. Its element is akasha, which is a Sanskrit word that means space or pure potentiality. The color associated with Vishuddha is blue. The mantra that corresponds with this chakra is Ham.

  • In Balance: When the throat chakra is in balance, you feel authentic and are a confident conversationalist and good listener.

  • Too Much: If you know the expression “all choked up” then you understand what too much throat chakra energy might feel like—an emotional overload. It is also associated with manipulative behavior, arrogance, and being too talkative.

  • Not Enough: When the throat energy is low, there can be a tendency to feel shy or reticent or to act in a passive-aggressive way.

SIXTH CHAKRA (forehead)

“I AM OPEN-MINDED”

legs up the wall

The sixth chakra is found at the center of your forehead, the third eye. This is the Ajna chakra. Your decisions, intuition, and choice-making are connected with this chakra, whose associated color is purple. The mantra that corresponds with this chakra is Sham.

  • In Balance: Ajna means “beyond wisdom,” and in balance you experience expanded imagination, clairvoyance, synchronicity, and intuition.

  • Too Much: When the third eye chakra is overactive, the mind races. You can feel that buzzy energy of over-caffeination or sleeplessness. It can be difficult to concentrate or stay on task.

  • Not Enough: Low or blocked Ajna energy impedes your ability to remember and concentrate. Processing speed slows and you may be prone to procrastination and indecision.

Purple Pentagon Worksheet (8).png

SEVENTH CHAKRA (crown)

“I AM PEACEFUL”

Savasana

The seventh chakra is called Sahaswara or the crown chakra. It is your connection to your source, spirit, or the collective consciousness. Its color is white or ultra-violet. The mantra that corresponds with this chakra is Om.

  • In Balance: In balance, this chakra maintains your self-awareness, wisdom, and connection to the inner compass that guides you to your highest self.

  • Too Much: Signs of too much crown energy include materialism and rigid self-identity.

  • Not Enough: Low crown energy leads to depression, a sense of disconnection from life, and a lack of compassion.

Purple Pentagon Worksheet (9).png


30 ways to integrate yoga into your SUMMER!

30 ways to integrate yoga into your SUMMER!

Happy July friends! The weather in the PNW this summer has been nothing short of amazing !! (aside from that early June heatwave of course!) since I am one of the 56% of folks without AC in the Seattle Metro area…. I felt like I was going into battle everyday trying to combat the extreme heat with fans, ice, and even tinfoil….

It has been great to get outside and play in the sunshine (when it’s not 100 degrees). Today I will be sharing 30 ways to integrate yoga into your summer!

We are all obviously aware of the amazing benefits of our physical practice (asana) but It is also awesome to practice (and to teach our kids) other facets of our practice, including stillness, gratitude and kindness. Yoga is a practice of transforming and benefitting every aspect of life. If we can learn to be kind, truthful and use our energy in a worthwhile way, we will not only benefit ourselves with our practice, but everything and everyone around us, so I came up with a list of 30 ways to integrate yoga into your summer. Complete with links for additional information and lots freebies!!

30 ways to integrate yoga into your summer

  1. Make up games with yoga cards for kids

  2. Act out yoga books for kids

3. Practice calming yoga poses at bedtime

4. Sit silently and meditate every day for 5 to 15 minutes

5. Deliver food to someone who needs help

6. Offer to do yard work for a neighbor

7. Practice mindful breathing as you are waiting in line

8. Practice mindful gardening.

9. Write in a Gratitude Journal every day

10. Eat mindfully and savor every bite

11. Practice partner yoga poses together

12. Make gratitude stones

13. Play yoga-pose bingo

14. Practice family yoga in the park

15. Attend a kids yoga class at your local studio

16. Practice restorative yoga poses after a busy summer day

17. Take pictures of your children practicing yoga poses and create a book

18. Practice yoga at your family reunion

19. Color mandalas

20. Chose a breathing technique and practice together

21. Make up yoga games (ex. yogi says, yoga Pictionary, strike a pose, freeze yoga tag) or yoga Jenga

22. Practice one Sun Salutation every morning

23. Set an intention (sankalpa) for the summer

24. Create a positive mantra and repeat it to yourself every day

25. Invite friends and neighbors over and host a Yoga summer camp.

26. Commit to five minutes per day of meditation, movement, or mindfulness

27. Plan some outdoor activities and talk about healthy snacking

28. Practice calming exercises

29. Spend time in nature and listen to the sounds

30. Practice getting upside down!

I love all of these activities and will be practicing many of them with my girls. I hope some or maybe all of these ideas will work for your family as well!

Namaste - Cassy


YOGA JENGA!

YOGA JENGA!

Jenga is a super fun and challenging game that can be played with 2 or more players. While I was in Mexico a couple of weeks ago, lounging by the pool, I was invited to play the Jenga version with the HUGE Jenga pieces. Anyway, it got me thinking about how fun it would be to develop a new yoga game out of a classic fav! So there we were at the pool playing Yoga Jenga… Everyone loved it because it gave them the opportunity to play a game that they are already familiar with and they were able to practice yoga poses, while working together, and having lots of fun. So today I am going to share with you all how to liven up your Jenga game by adding yoga into the mix!


Copy of Copy of Copy of Copy of Spring Mood Instagram Story (2).png
  1. How to play Yoga Jenga

  1. Before playing write the names of yoga poses on Jenga Blocks in a permanent marker. (you could also write on a blank white sticker instead of directly on the block)

  2. Set up the Jenga Blocks as if playing a normal game.

  3. Each player takes a turn carefully drawing out one block out at a time being careful not to let the tower fall

  4. The player will read aloud the pose and demonstrate it. Everyone then practices the yoga pose.

  5. The player places the block onto top of the tower.

  6. Continue around the circle with each child selecting a block. As per normal Jenga rules, when the blocks fall, the game is over.

Kids and adults of all ages enjoy Yoga Jega. It is a fun way to learn and practice many many poses. You could also play this game using kid friendly exercises or you could use feelings instead of yoga poses to help kids talk about their emotions and experiences, building their vocabulary of emotion words and improve their communication skills.

 I hope you enjoy this game as much as we have!

Namaste,

Cassy

Teaching Kids Inversions  Safely

Teaching Kids Inversions Safely

Ahhhh Spring…..When you can feel that sense of transition, the cold and dark start to fade away, the sun begins to shine brightly once more, plants and flowers bloom, and the animals emerge once again. Spring is a time for us to embark on new journeys and start new projects with fresh ideas. Spring is just so refreshing and makes me feel motivated, I feel like challenging myself to try new things! This brings me to this month’s kids yoga theme. Trying something new and challenging like inversions!!

What is a yoga inversion?

Yoga inversions are a category of yoga poses, that place your head below your heart and hips, therefore “inverting” your body from its normal upright position.

Any pose in which your heart is higher from the ground than your head is considered an inversion.

When I teach kids yoga classes, their all time favorite thing to practice is always inversions and arm balances. Obviously safety is crucial when teaching inversions. Some kids are so eager to try it and end up whipping right into a headstand as soon as you say the word but you must be ready for that and have them watch first. I always take the students through the pose step by step and allow them to see the proper technique so they can practice correctly and safely.

Inversions can sound scary to try…especially with kids. The great news is that Inversions do not need to be difficult to do and the benefits are enormous.


Benefits of inversions

Improves circulation and brain activity – flushing refreshed blood and nutrients around the whole body, especially the brain.

  • Gives the heart a break – as the heart is constantly working to pump blood upward towards the brain, inversions assist in the flow of blood to the brain, with little work from the heart.

  • Improves immunity – inversions help to stimulate lymphatic cleansing and drainage which assists in clearing toxins from the body.

  • Stimulates the nervous system – increasing mental alertness and clarity.

  • Natural antidepressant – flushing the adrenal glands stimulating the release of endorphins.

  • Glowing skin – by reversing the flow and ageing force of gravity, new oxygen stimulates the capillaries in the skin and face.

  • Increases the digestive fire – aiding the digestive and elimination process.

  • Energizes the body – increasing core strength and improves posture.

  • Calms the mind – relieving stress, assisting with better seep patterns.

  • Builds confidence – and most importantly is fun!


Tips to practicing inversions safely

Always practice safely and mindfully – Start gradually with variations that allow your child to build up strength and flexibility. Try using a wall for support to begin before freestanding.

Be aware of your body in alignment – If you feel like their alignment is not quite right, have them come out of the inversion first, make the adjustments and then come back into the pose. Avoid making adjustments while inverted.

Work through this list of yoga inversions one at a time, taking care to rest between each new pose, without rushing your body.


Inversions to try

IMG_1531.jpg

LEGS UP THE WALL

Set up your mat so the short edge is touching a wall.

If you are using them, please gather your props. The most common prop use is to place a folded blanket, or yoga bolster, under your lower back.

Lie down on your side with butt and legs touching the wall, where the floor and wall meet.

Turn onto your back and, as you do, bring your legs up the wall.

You can have your legs in a V-shape, or bring your legs together. Work to keep your legs straight and connected to the wall.

IMG_1542.jpg

SHOULDER STAND

Lift your hips off of the mat coming into bridge pose and extend your arms onto the ground, palms facing down as if your hands could touch your heels. Press firmly into the palms using them as leverage to lift onto the balls of the feet and extend one leg up. Bend at the elbows, place your hands on your low back creating a shelf, and then extend the next leg up.

Once you raise the legs, don't turn your head to the side to look around the room, since you can injure your neck. Keep your gaze upward and your neck straight.

Lift up through the balls of your feet. Walk your hands further up the back for more stability. Feel the chest reaching towards the chin to support opening the upper back.

Move your hips toward the front of the room and your feet toward the back of the room to straighten the body. The correct alignment is with the hips over the shoulders and feet over the hips. Ask your teacher or a friend to help you determine if your legs are perpendicular to the floor.

crow

Bend your knees slightly so that you can bring your palms flat on the floor about shoulder's distance apart.

  1. Plant your palms firmly on the mat about a foot in front of your feet. Spread your fingers wide and press into the top joint of each finger.

  2. Bend your elbows straight back. Don't bend them into full Chaturanga arms, but head in that direction.

  3. Come up onto the balls of your feet and open your knees so that they line up with your upper arms.

  4. Place your knees on the backs of your upper arms.

  5. Begin to bring your weight forward into your hands, lifting your head as you go.

  6. Come up onto your tiptoes, then lift one foot and then the other off the floor.

  7. Engage the inner thighs for support while keeping the knees on the arms.

  8. Hug your feet toward your butt.

Blank 2000 x 2000.png

tripod

Start from a neutral tabletop position, where your hands are directly under your shoulders, knees directly under the hips.

  1. Slowly take the top of your head to touch the floor about six inches in front of your hands and lift your hips up and back so that your torso is almost vertically straight.

  2. Engage your core as you bend your knees and shift your hips forward to take your feet up.


Blank 2000 x 2000 (1).png

Headstand

From your tripod, gradually straighten your legs and you got it!

Blank 2000 x 2000 (2).png

L-Shaped Handstand Step-By-Step

There are a couple of different ways to complete a handstand against the wall. One way is to obviously kick up while facing the wall, but I like to start with the L-shaped handstand because it helps to strengthen your shoulders and core while getting the feeling of being upside down. You can get used to doing this gradually, simply push forwards a little bit, then go back, then go forwards a little bit more until you find the balance point. Notice your feet also. They'll get lighter as you move closer to balancing.

  • Start with sitting away from the wall with your feet flat up against the wall.

  • Take your hands, place them on the floor beside your hips; and flip over into a Tabletop Position.

  • Lift your hips up and come into a short Downward Dog with your heels against the wall.

  • Now engage your core and take both feet to the wall to come into L-Shape.

  • Eventually lifting one leg at a time until you are able to hold the handstand.

Blank 2000 x 2000 (3).png

Kicking up to handstand against the wall

Step One:

Place your palms on the floor one foot away from a wall. Spread your fingers wide. Your hands should be the same distance apart as the distance between your shoulders. Straighten your arms and walk your feet back into  Downward Dog Pose.

Blank 2000 x 2000 (4).png

Step Two

Step one foot a little closer to the wall. This foot will act as your spring to kick up. Take a breath. On your exhalation, push up hard on your springing leg to lift both legs up and raise them up against the wall in front of you. Only your heels should rest on the wall. Your arms stay straight beneath you. Straighten your legs and lengthen them up the ceiling, tucking your tailbone in.

Blank 2000 x 2000 (5).png

Step Three

You can practice hopping and kicking your legs up a few times. If you feel strong enough to do the pose but have trouble getting your legs over your head, then try coming into the pose in gymnastics style. You can stand up straight and tall, lifting your arms up high in the air. Then arch your back, look up, and in one fluid motion, you bounce forward as if you would do a flip, putting your hands on the floor one foot in front of the wall. Keep your legs straight after kicking up. Here the momentum of your hands falling down onto the floor will help you kick and launch your legs up over your head on the wall.

Step Four

Once you are in the Handstand, avoid arching your lower back too much. Pull your front ribs in closer to your spine and push your heels further up the wall.

I hope you and your little ones enjoy practicing some of these inversions! Feel free to reach out to any of the instructors at Spark if you have any questions!

Love and Light-

Cassy

My Aching Back! Great Yoga Poses for Kids to Improve Posture and Ease Aches and Pains From Distance Learning

Distance learning……I know some kids are thriving while learning from home and other’s are struggling. Whether you love it or could leave it, the common thread is that our kids are sitting in front of computers for long hours every day resulting in an abnormal amount of aches and pains and increasingly poor posture. With so many students spending unprecedented long hours on their computers to keep up their grades, experts are reminding parents that without a proper home workstation, remote learning may cause aches and pains and potentially lead to injuries over time.

According to a Facebook survey earlier this year from the American Chiropractic Association, 92% of chiropractors said patients are reporting more neck, back, or other musculoskeletal issues since the pandemic began. Kids are no exception. Students could be even more at risk, since they often do their school work from bed or the floor, slumped over screens for hours at a time. 

Thank goodness we have yoga to help combat these issues!!! Today I am going to share some great yoga poses to help ease those aches and pains as well as improve posture while our kids continue to learn from home.

Child’s pose

Child's Pose (Balansana) is yoga's most important resting posture and it is a nice way to gently stretch various parts of your body. Child's Pose is a gentle stretch for the back, hips, thighs, and ankles. It can help relieve back pain.

Image 3024.0x4032.0 (1).jpg

Step-by-Step Instructions

  1. Come to your hands and knees on the mat.

  2. Spread your knees as wide as your mat, keeping the tops of your feet on the floor with the big toes touching.

  3. Bring your belly to rest between your thighs and root your forehead to the floor. Relax the shoulders, jaw, and eyes. If it is not comfortable to place the forehead on the floor, rest it on a block or two stacked fists.

Cat/Cow

The Cat-Cow Stretch (Chakravakasana) involves moving the spine from a rounded position (flexion) to an arched one (extension). Flexing and extending the spine can help improve circulation in the discs in your back. It's a basic motion, but one that can be enormously beneficial in supporting the back and easing pain and maintaining a healthy spine, especially if you spend a lot of time sitting.

Cat-Cow Stretch helps to improve posture and balance. It is also believed to be a good stress-reliever and calming pose, since you link the movements with your breathing.

Image+3024.0x4032.0+%285%29.jpg
Image 3024.0x4032.0 copy (1).jpg

Step-by-Step Instructions

Start on your hands and knees, aligning your wrists underneath your shoulders and your knees underneath your hips.

  1. Think of the spine as a straight line connecting the shoulders to the hips. Try visualizing the line extending forward through the crown of the head and back through the tailbone. This is the position of a neutral spine.

  2. Keep the neck long by looking down and out.

Inhale and Arch for Cow Pose

  1. Curl your toes under.

  2. Tilt your pelvis back so that your tailbone sticks up.

  3. Let this movement ripple from your tailbone up your spine so that your neck is the last thing to move.

  4. Your belly drops down, but keep your abdominal muscles hugging your spine by drawing your navel in.

  5. Take your gaze gently up toward the ceiling without cranking your neck.

Exhale and Round for Cat Pose

Release the tops of your feet to the floor.

  1. Tip your pelvis forward, tucking your tailbone. Again, let this action move up your spine. Your spine will naturally round.

  2. Draw your navel toward your spine.

  3. Drop your head.

  4. Take your gaze to your navel.

Repeat the Cat-Cow Stretch on each inhale and exhale, matching the movement to your own breath.

Continue for 5 to 10 breaths, moving the whole spine. After your final exhale, come back to a neutral spine.

Cobra Pose

Cobra pose, the alternative to upward facing dog (Urdhva Mukha Shvanasana) increases the mobility of the spine, strengthens spinal support muscles, and can help relieve back pain. It opens the chest and the front of the body.

Image 3024.0x4032.0 copy.png

Step-by-Step Instructions

Start by laying flat on your stomach.

  1. Place your palms flat on the ground directly under your shoulders. Bend your elbows straight back and hug them into your sides.

  2. Pause for a moment looking straight down at your mat with your neck in a neutral position. Anchor your pubic bone to the floor.

  3. Inhale to lift your chest off the floor. Roll your shoulders back and keep your low ribs on the floor. Make sure your elbows continue hugging your sides. Don't let them wing out to either side.

  4. Keep your neck neutral. Don’t crank it up. Your gaze should stay on the floor.

Downward Facing Dog

Doward Facing Dog (Adho Mukha Svanasana) stretches the hamstrings and calves and strengthens the arms, legs, and back. It can help relieve back pain. As a mild inversion, it acts in reverse of the usual forces on your spine and brings more blood flow to your brain. The pose also strengthens the deep abdominal muscles that help stabilize the spine.

Image 3024.0x4032.0 (3).jpg

Step-by-Step Instructions

You can do this pose anywhere you can lay out a yoga mat.

  1. Come to your hands and knees with the wrists underneath the shoulders and the knees underneath the hips.

  2. Curl your toes under and push back through your hands to lift your hips and straighten your legs.

  3. Spread your fingers and ground down from the forearms into the fingertips.

  4. Outwardly rotate your upper arms to broaden the collarbones.

  5. Let your head hang and move your shoulder blades away from your ears towards your hips.

  6. Engage your quadriceps strongly to take the burden of your body's weight off your arms. This action goes a long way toward making this a resting pose.

  7. Rotate your thighs inward, keep your tail high, and sink your heels towards the floor.

  8. Check that the distance between your hands and feet is correct by coming forward to a a plank position. The distance between the hands and feet should be the same in these two poses. Do not step the feet toward the hands in down dog in order the get the heels to the floor.

  9. Exhale and bend your knees to release and come back to your hands and knees.

Ragdoll Pose

Ragdoll pose (uttanasana) is a basic standing forward bend yoga posture that stretches the lower back. Ragdoll pose is considered a simple variation of standing forward bend.

Image 3024.0x4032.0 (7).jpg

Step-by-Step Instructions

1. Begin with the feet hip-width apart and the knees flexed.

2. Bend forward from the hips, allowing the head to hang down between the upper arms.

3. Cross the arms and softly grasp each elbow with the opposite hand. To release the back, gently sway from side to side.

Bridge Pose

The yoga supported bridge pose (Setu Bandha Sarvangasana) helps to relieve lower back pain. In the supported pelvic bridge, the core abdominal, back, hip and hamstring muscles work in concert to bring and keep the lower body in the air. It is a multi-joint movement, which many experts believe is the best way to activate, use and strengthen your core.

Image 3024.0x4032.0 copy.jpg

Step-by-Step Instructions

You will need your yoga block or a similar solid bolster handy.

  1. Lie on your back with your knees bent and the soles of your feet flat on the floor.

  2. Extend your arms on the floor with your fingers reaching toward your heels. You should be able to just barely touch the backs of your heels with your fingertips.

  3. Keep your feet parallel. Maintain that position throughout the pose.

  4. Press down into the soles of your feet to lift your hips off the floor.

  5. Slide your yoga block under your back directly under your sacrum, letting it rest securely on the bolster. Your arms can stay outstretched on the floor next to your body.

  6. This should be a comfortable position. You may want to stay here several minutes as your body settles into the stretch and gets the benefits of a passive backbend. If the pose causes your back to hurt, remove the block and come down.

  7. To come out, press down into your feet and lift your hips again. Slide the block out from under your sacrum and gently lower your back to the floor.

The exercises above work best when you combine them with other posture-protecting practices. It’s also important to take frequent breaks as we are distance learning.

Here are some other suggestions for posture protection:

  • Shift positions every 30 to 60 minutes.

  • Use a stand for tablets and smartphones when possible.

  • Make sure your computer, keyboard and mouse are in spine-friendly spots.

  • Consider a standing desk or treadmill work station to minimize sitting and leaning.

  • Don’t lie on a sofa or bed while you work.

My girls have been regularly practicing these poses and have already reported relief from their early onset aches and pains. Try these at home with your kids! they will totally love it!!

Namaste!

- Cassy

10 Ways to Bring Hygge Traditions Home for The Holidays

10 Ways to Bring Hygge Traditions Home for The Holidays

Hello friends! Can you believe we are already in December??? 2020 has been a DOOZY and has turned everything completely upside down. People are really craving some sort of normalcy and happiness in their lives. This year I noticed many folks were getting a jump start on that Christmas cheer. November 1st, the skeletons and jack-o-lanterns made way for the twinkling lights and Christmas wreaths. Several local Christmas tree farms even opened early and those with artificial trees couldn't wait to put them on display. Turns out, getting into the holiday spirit is a great way to feel more positive in a world that has felt so unsettling over the last several months. With shutdowns and social distancing we have also been forced to slow down. The theme this season is a return to the simplicity of the holiday.

This year, I challenge you to let go of expectations. Let go of the expectations of the ghosts of Christmas past. When you are able to let go of expectations, you are able to focus on the differences that are good. But this has to come from within you, no one can make a mindset shift for you.

You have to be ready to embrace the change and make the most of the situation we are in. Are you with me? Here are a couple of good things about a Socially Distant Christmas:

  • More time. Finally MORE time. Less rushing. Take time to read a book, take time to search independent stores for perfect gifts (avoid amazon!), take time to watch old movies, take time to bake some cookies.

  • Peace & Calm. Yes, we love a good party, with lots going and lots of people around us.. but peace & calm is a great time to recharge and re-energize.

  • Save a little money. No parties, no work secret santas, no theatre trips etc, you will be saving a fair few pennies. Which in the current situation, is probably helpful.

HYGGE:

Have you ever heard of Hygge? If you have not heard of Hygge, then I have a treat for you! Hygge (pronounced hoo-guh) is a Danish word for the feeling of being cozy, content, and enjoying the small things in life. There isn’t an exact definition because it’s a feeling you get. The word hygge originally came from Norway.  It’s translation loosely meant well-being.  The Danish adopted the word as their own and they embody the hygge lifestyle.  Danes are among the happiest people in the world and they attribute their happiness in part to hygge!!

So today I am going to share with you some great Hygge traditions so you can really slow down and enjoy the simple things with your family.

Much like mindfulness and an attitude of gratitude, Hygge it is an outlook on life that focuses on simple pleasures and taking the time to cultivate more of them in your life. It’s when you give your body, mind and spirit a rest and enjoy the good things in life, like a sunrise or sunset, reading a book in front of crackling fire, taking the time to savor a delicious mug of coffee or tea, and spending time with loved ones in a comfortable setting. 

Instead of living your life on autopilot, hygge is a way of life that makes sure you live your life in a way that brings deep contentment to your soul. 

Sometimes the outer things in life (money, power, achievements) aren’t the things that will make us happy.  A hygge life encourages us to look at what truly brings us joy and it to make sure we include those things in our days. 

Hygge Christmas Idea #1 – Christmas camping.

tree.JPG

Let your little ones sleep under the Christmas tree in sleeping bags.  Turn out all the lights except for the glow of the tree.  

You can read your children their favorite Christmas stories!  

Hygge Christmas Idea #2 – Holiday dishes.  

dishes.jpg

A fun holiday tradition is to have a set of Christmas-themed dishes to use starting December 1st until Christmas.  You could either get an entire set of the same kind of dishes, or you can piece your holiday table settings together by picking up individual pieces at thrift stores.    

Hygge Christmas Idea #3 – Matching pajamas.  

Celebrate being a family by getting everyone matching pajamas to wear on Christmas Eve.  Also if you have not seen the Christmas Jammies video on You Tube check it out!

jammies.jpg

Hygge Christmas Idea #4 – Ornaments with history

Picture yourself 10 years from now pulling out your masked gingerbread man ornament and saying, oh yes, 2020. That was QUITE the year.

Picture yourself 10 years from now pulling out your masked gingerbread man ornament and saying, oh yes, 2020. That was QUITE the year.

I love absolutely love Christmas ornaments! Every year we have so much fun unpacking them and taking a trip down memory lane. Each ornament tells a story and takes on a life of it's own. Every year we add new ornaments to the tree. To add to the story, I like to get ornaments that represent a new passion or interest, relevant world events, personal or professional milestones, and ongoing or new tradition ornaments.


Hygge Christmas Idea # 5– Holiday windows.  

Put each family member in charge of decorating one window in your home.  Hold a contest where you give prizes out for the most creative one. 

They can either decorate the window, or if there’s a window ledge that can be where the holiday display is created. 

Hygge Christmas Idea #6 – Secret Santa  

Place all your family member names in a bowl and each person draws a name and becomes his or her secret Santa.  

The idea is to do nice things for the person you drew without being caught.  On Christmas Eve, everyone takes a guess who his or her secret santa is and then they are revealed during dinner.

Hygge Christmas Idea #7 – Movie night.   

Designate one day to be a magical Christmas movie marathon extravaganza.  Have everything ready to get comfortable and watch all the classic movies we have all come to love. 

Set up a hot chocolate bar, have piles of blankets ready, pizza ready to go in the oven and lots of pillows for everyone to settle in and enjoy the day.

family.jpg

Hygge Christmas Idea #8 – Gone, but not forgotten.  

Place the pictures of loved ones in small frames and place on the fireplace mantel.  You can add a bit of evergreen around the pictures to symbolize eternal life. 

You could also put photos in small frames and hang them on the Christmas tree.  

Tell your children Christmas stories of your loved ones, so their memories continue to live on in future generations.

Hygge Christmas Idea #9 – Christmas pickle. 

pickle-ornament.jpg

OK, lets talk about the pickle ornament.....They are surprisingly popular and I always assumed the pickle was a quirky hipster ornament like avocado toast, or bacon. Well my mind was actually blown when I learned the pickle ornament carries a long-running tradition in many parts of the country. It's possible that I am the last one to know about the pickle tradition, but in case you have also been in the dark on this one...... According to legend, the pickle ornament is hidden somewhere on the tree on Christmas Eve, and the first person to find it gets good luck for a year, and they also get to open the first present on Christmas Day. Some versions of the story say whoever finds the pickle gets a special extra present as a pickle-finding bonus.

Hygge Christmas Idea #10– Natural decor.  

house-of-jade-interiors-orange-slices-garland-christmas-decor.jpg

Using natural elements to create a beautiful, cozy space during the holiday season is huge for 2020. Nature inspired colors with vibrant greens. Old craftsmanship is being revived. Lots of dried flowers, seed bulbs, bark and grass combined with metals. This is a very budget friendly way to decorate and with so many DIY options, it can be fun for the whole family!

 I really love the idea of integrating Hygge traditions into my family’s holiday season. This year seems like the perfect year to be able to fully engage in this process. I wish you all Peace, Love and safety during this holiday season and I will see you on your mat soon!!! Namaste— Cassy

Gratitude Activities For the Whole Fam!

Gratitude Activities For the Whole Fam!

There is no doubt 2020 has been a whirlwind – a global pandemic, economic uncertainty, urgency around racial injustice, and political turmoil. Even with all of this unrest, there are signs that gratitude can serve as a powerful antidote and anchor for our collective well-being. We can still steady ourselves by focusing on the things we are thankful for and we can encourage our kids to also regularly practice gratitude.

Studies show that gratitude for kids can be a very powerful tool, with lots of benefits to mental and physical health. They include things like:

  • Higher levels of happiness and optimism

  • Improved sleep

  • Less stress and an improved ability to cope with stress

  • Fewer physical problems

  • Reduced depression

  • Less aggression

  • Increased self esteem

  • Improved resilience

Gratitude and grateful thinking are about expressing appreciation for the blessings in our lives, instead of becoming fixated on the negative aspects, and what we do not have. In other words, when we give more of our attention to the people, events, places, and things that we are thankful for, it can lead to the habit of feeling grateful and fulfilled.

Building a Gratitude Practice

There are many ways that we all can begin to incorporate more gratitude into our lives. Remember that when making any change in behavior, it is best to start small and gradually build over time.

Where to start

Encourage your child to chose one or two times per day they can devote to being grateful. A good time to consider is as they are falling asleep each night, to think of three things that happened during that day that they are thankful for, or they could try to think of the one thing they are most grateful for. It is best to be as specific as possible. Instead of saying “I am grateful for my family” think …“I am grateful my mom cooked my favorite dinner.” Or “I am grateful that my dad gave me a hug before bed.”

Gratitude Journal

Once they have practiced that, older children can upgrade to a Gratitude Journal. All they would need is 5-10 minutes each night or first thing in the morning, reflecting on all of the things in their life they appreciate. The act of writing it down helps to solidify in your mind the memories and experiences.

Gratitude as a family

Consider incorporating your family into the practice. When sitting down to meals, ask your family members one thing that happened today that they each feel grateful for. We tend to do this before Thanksgiving dinner, but we can also do this as we sit down with our take-out pizza.

Expressing appreciation for others

Encourage your kiddos to take opportunities in their day to express appreciation for others. They can write a thank you note to someone and send it in the mail!

It is important to note that gratitude is not the same as denial or wearing rose colored glasses. It does not dismiss or deny the very real things that are not ‘ok’ in our society. Instead, gratitude helps us to collectively notice and appreciate the beauty, the kindness, the love that surrounds us every day. Sharing our gratitude allows us to work together to find solutions and to maintain hope in the face of adversity.

Gratitude activities

Fun gratitude crafts and activities can help children and adults establish the habit of paying attention to the good things in life. When we are thankful for what we have, we are given more of what we are grateful for, and, can find greater happiness in life. I created some activities and printables below for your families to strengthen your gratitude muscles!!

Gratitude Scavenger Hunt

GRATITUDE .png
Gratitude is the child of attention. When we stop to take in what’s before us, a single moment becomes suddenly divisible into thousands. As theologian and mental health nurse John Swinton writes, there is fast time and there is slow time. Fast time is deadlines and efficiency and workweeks. Slow time moves at the speed of love.

30 days of Gratitude Challenge

30 days of Gratitude.png

I hope you and your family enjoy these activities! Feel free to share some of your experiences on Facebook and Instagram and tag us! Wishing you lots of love and light. Namaste- Cassy

Fall Themed Deep Breathing Technique For The Kids!

Fall Themed Deep Breathing Technique For The Kids!

Looking for some deep breathing exercises to teach the kids? Try this fall themed technique!! t's just one of many techniques that can be helpful for kids to cope with anxiety.

Benefits of deep breathing include:

  • helping to reduce anxiety and stress

  • helping to reduce pain sensation

  • improving concentration

I think we all know that convincing a child to simply stop and breathe deep in the middle of a meltdown is not easy. Studies show that using a visual cue is very useful in teaching kids deep breathing techniques and strategies, especially when they can trace their finger around the shape as a way to keep them grounded.

This fall leaf breathing exercise is a twist on star breathing where you trace around a star while you breathe in and out, over and over. But obviously substitute a colorful leaf for the star.

The technique is pretty straightforward to do and can be great for kids and adults of any age to learn!

As for how to do the actual deep breathing technique, simply trace the leaf and follow the instructions. Breathe in. Hold. Breathe out. Repeat.

I hope this technique is useful for you and your kiddos! Until next time!! Lots of love and light from me to you and yours.

Namaste— Cassy


Embed Block
Add an embed URL or code. Learn more

How to Create a Supportive Virtual Learning Space For Your Kids

How to Create a Supportive Virtual Learning Space For Your Kids

Remember back in March, when schools announced they would be closed for 6 weeks in our area? I remember being in disbelief!!! I could not comprehend a world where we would not be able to send our kids to school for 6 weeks! Well, needless to say 6 weeks turned into 3 months, tack on a summer and now here we are into the fall with still no school to send our kids off to. None of this has been easy; Not for parents and certainly not for our children…. but hey, we have had to adapt right?

So here we are…. At home…. With our kids… Virtual learning. It’s time to get ready for school in a new way. Instead of getting new backpacks and lunchboxes, we got desks and chairs. We skipped on new outfits, and instead bought new gadgets. 

As a mom of a fifth grader and eighth grader I decided to do some research on how to best accommodate the kiddos and their school work while they are at home. I have come up with some steps to create a proper learning space for your students while they are continuing their education at home. 

Why does a learning space matter? So before I walk you through creating your learning space, lets talk about why learning spaces matter. You might be wondering why a child just can’t simply hop on the family couch and learn there. According to Waterford.org, sitting on the couch "might not be the best way for a child to learn. Without a specific learning spot, young learners can be easily distracted, they don’t have supplies they need nearby, and there’s no sense of consistency. The family couch, then, as comfortable and easy as it seems, may not be the right option for young children needing to learn about routines, early education, and self-regulation."  

Find an area in your home that you want to dedicate to your child's learning.  So it’s time to convert your dining room, playroom, portion of your kids room, spare bedroom, or kitchen table into a learning area. Many households do not have the luxury of a whole extra room just for learning. But don’t worry. If you are stressing about where to create a space, know there are lots of options and easy ways you can do this. You just might need to think outside the box a bit.

This space created by children of the tribe was put together with some plywood and cinder blocks and they still managed to pull it together aesthetically with the Mid Century Modern white molded chair and cool triangle design shelves! 

This space created by children of the tribe was put together with some plywood and cinder blocks and they still managed to pull it together aesthetically with the Mid Century Modern white molded chair and cool triangle design shelves!

I LOVE this idea by refreshliving.us. She created wall mounted desks by using an old table cut in half. Brilliant!!https://refreshliving.us/make-desks-from-dining-table/

I LOVE this idea by refreshliving.us. She created wall mounted desks by using an old table cut in half. Brilliant!!

https://refreshliving.us/make-desks-from-dining-table/

Think about creating consistency. You can dedicate a corner of a room, but you can also create learning spaces that are more flexible. For example, pull out the same foldable chairs and tables when it is time to learn, or create a learning box you can bring to the kitchen table each day. Your learning space could even be a specific lap desk in the living room. The key is to create a specific routine and spot for your child’s learning. At the end of the day, it is most important to show your child that you value learning enough to give it a consistent place in your home. Gather up all the school supplies your child needs (pens, pencils, laptops, books, and homework assignments). Get or use a calendar you already have at the house to use for school assignments. Hang it in your new school work area so it is visible to help keep everyone on the same page.


This learning space by Mood Maybe is tucked into a closet, it still manages to fit in all the essentials including the computer, multiple sets of drawers and plenty of book storage.

This learning space by Mood Maybe is tucked into a closet, it still manages to fit in all the essentials including the computer, multiple sets of drawers and plenty of book storage.

A dedicated home learning space can help develop your child’s creativity, sharpen their focus, and increase their motivation to read and learn. With just a little bit of money and creativity you can easily create an impactful learning space!


Declutter your designated space. After designating your learning space, focus on removing distractions. Too many toys, books, and supplies can crowd a space and create a feeling of chaos. Create an orderly environment by decluttering the area. You can methodically work your way through your space over a few days or a week (or whatever) to make it exactly what you want! You just need to stay on it once you’ve started! 

 Re-purpose and re-use what you have and be creative with paint! Add a pop of color to some bookshelves and or tables. And don't forget that an inexpensive rug can complete a theme and freshen up a tired room! Get at least one piece of storage furniture (or dedicate a closet) where you can “shut away” the stuff. Roll your posters, diagrams, maps, and pictures into tubes and place them in a basket . This is a great way to keep your work in tact while also saving space. 

This space by Classy Clutter is a great example of how to use vintage or second hand furniture for your learning space. She bought these at a local thrift store for only $8 a piece. With the help of some black and kelly green spray paint and of cour…

This space by Classy Clutter is a great example of how to use vintage or second hand furniture for your learning space. She bought these at a local thrift store for only $8 a piece. With the help of some black and kelly green spray paint and of course gold legs these desk were revamped in no time.

Make your learning space comfortable for your child.

Make it fun and encourage your child to participate in the process. Make the space personal to your child. Be sure the space plays into their interests and encourages your child to learn! What motivates them? What sparks their interest? What do they love learning about? When you create a learning space in your home, look for ways to create inspiring, creative, and visual places for a child’s mind to wander. For example, hang small pictures, posters, family photos, and other things that create a positive place where a child feels inspired, safe, and free. Ensure any word posters have positive reinforcement statements and shy away from hanging up rules. Think about posters that a child will be excited to explore, like world maps, animal posters, or whatever else they might be interested in learning and seeing. 

Organize a Well-Lit Area. Believe it or not, lighting is an important factor in effective learning spaces. In fact, Christopher Alexander, Emeritus Professor of Architecture at UC Berkeley, stated that low levels of light in classrooms affected students’ ability to regulate their natural cycle of sleep and attention. Another study found that the more natural light (or lighting that mimicked natural sunlight), the greater the students’ school attendance, achievement, and overall health. From these studies we learn that lighting can affect a child’s energy, attention, and achievement levels.

 If you do not have windows or good lighting in the space where your child learns, you can also use mirrors! Place a mirror across from a window to reflect more of the natural light into the room.  

Gather Books and Leave Room for Growth Have books available and leave room for more books to collect! Again, according waterford.org, Research shows that children in homes where books are readily available benefit—in terms of improved test scores—from their mere presence. And this is especially true in low-education and low-income homes. The research even shows that no matter how many books your home already has, every addition benefits your children even more.

books+2.jpg

I hope that some of these ideas help you and your kids on your virtual learning journey and I hope you are talking care of you and yours!! Leaving you with a couple of powerful quotes…..

Namaste - Cassy

granted.JPG


DIY Affirmation Stones for Kids

DIY Affirmation Stones for Kids

Negative thoughts are total confidence smashers. Of course we are all guilty of having negative thoughts, but my heart breaks a little each time I hear one of my girls say they aren’t good at something, or they're not smart enough and end up giving up on the task they're working on. A great way to conquer those negative thoughts is to have a regular practice of daily affirmations.

As it turns outs, there’s a lot of science to back up exactly how a set of positive words (affirmations) can dramatically improve your mind and body. By offering these stones as something to focus on they have a chance to redirect their thoughts & create a more positive outcome. 

1) Positive affirmations are always in the present tense. If you see a positive affirmation that says “I will,” “I used to” or “I’m going to,” move on. Your brain only responds to present tense statements.

2) Positive affirmations only include positive words. If you see a positive affirmation that has words like “don’t,” “can’t” or “won’t,” it’s not a statement you’ll want to repeat. It takes your brain a lot of extra work to get past negative statements and transform them into positive ones.

3) Positive affirmations are spoken as statements of fact and truth. Statements that contain words like “might” and “could” aren’t nearly as powerful as statements that contain words like “am” and “do.”

It’s best to have your affirmation be clear & easy to remember so I just added one simple word to each stone using the Sharpie pens (we got some clear decorative stones at the dollar store). You could add any number of affirmations to the stones & choose different ones to suit your child's situation. If your kiddo struggles with anxiety you may want to add more calming, peaceful words, or if you have a child who struggles with their confidence, maybe affirmations focusing on strength, positivity, & uniqueness would be more helpful.

image (12).png

Each morning encourage your child to take one of the stones from the box. Encourage them to read aloud the word written on that stone, this becomes their affirmation for the day. "Today I am...". Using "I AM" at the start of the affirmation creates a bold empowering statement for a child, focusing on what is achievable, rather than what is not. Also by using a present tense they begin to create the outcome now. At the end of the day, talk to your child about times throughout the day when they had been calm/helpful/brave. Praise your child when you see them being calm/happy/brave. praising your child can only be a good thing, & who knows what a difference that may have on their thinking & behavior.

I hope you have fun creating these powerful affirmation stones together!

Namaste- Cassy

POWER POSE YOGA SEQUENCE!

POWER POSE YOGA SEQUENCE!

The yoga sequence I put together for this week’s blog is inspired by the benefits of Power Posing. Amy Cuddy, a social psychologist demonstrates through her research that “power posing,” or holding a posture that appears confident even when you don’t actually feel that way, can have a tremendous positive ripple effect.

So what exactly is a power pose you ask? A Power Pose is a physical expression of confidence, specifically related to posture. A power pose might involve raising or opening your arms, moving your hands away from your body or opening yourself up to the full extent. Picture Wonder Woman, Superman, or pretty much any super hero you can think of.

The opposite of a power pose is  making yourself smaller. It could be crossing your legs or arms, hunching over, holding your elbows, or generally closing up your body as if you were afraid of taking up space.

Cuddy’s research on posture reveals that holding these poses can literally alter your hormones. Specifically, one can experience a significant increase dominance hormones (testosterone) and reduction in stress hormones (cortisol). As a result, people of all ages demonstrate increased willingness to take risks, boosted confidence, and better performance in demanding situations.

Cuddy has received feedback from athletes, surgeons, politicians, elementary school students, victims of bullying, people with physical and mental disabilities, that adopting a confident pose generates feelings of self-assurance almost instant.

From my personal experience teaching power poses to kids, I have noticed an immediate positive energy shift (especially when I encourage big smiles!!)

The most important aspect of this sequence is to have fun!! It’s not about getting the perfect pose or proper alignment. It is about filling up space and being comfortable,happy and confident in your body!! Also this sequence is great for all ages!

“Our bodies change our minds, our minds change our behavior, and our behavior changes our outcomes.” - Amy Cuddy

POWER POSE YOGA SEQUENCE :

Mountain pose

image (11).png

Starting in mountain pose, anchor into your body. Starting on your feet and moving upward. As you make adjustments, your body will attain a strong, active posture. Lift the chest and open the hands wide. BIG SMILES!!

INHALE!!! Reach hands over head and reach your arms up high opening your hands wide (think spirit fingers here) BIG SMILES!!! Reach reach reach arms strong and wide, separate feet wide!

image+%289%29.jpg

Don’t be afraid to have fun here! There are no rules. Maybe add in some jumping jacks or spin around!

image (5).png

Forward fold

Simply fold forward and release hands to the mat. Allow for some time here to stretch into the hamstrings and find some movement.

DOWNWARD FACING DOG!

Step back into downward facing dog. If you decide to go through this sequence a second and third time, encourage jumping back to downward facing dog!!

image (6).png
Shift forward into a plank pose. Suction cup your belly up and in, press the mat a way with your hands!!! Strong arms strong core!

Shift forward into a plank pose. Suction cup your belly up and in, press the mat a way with your hands!!! Strong arms strong core!

Cobra Pose!! Drop  down onto your knees, belly, chin and chest, press your hands into the mat and lift your chest up as you drop hips down!! Open your heart here and feel pride!

Cobra Pose!! Drop down onto your knees, belly, chin and chest, press your hands into the mat and lift your chest up as you drop hips down!! Open your heart here and feel pride!

IMG_5359.png

Press back up to downward facing dog!!

From downward facing dog step forward with the right leg first into CRESCENT LUNGE!!!! Arms out wide and high!!! SMILE!!!

From downward facing dog step forward with the right leg first into CRESCENT LUNGE!!!! Arms out wide and high!!! SMILE!!!

Step forward into CHAIR POWER POSE!!!! STRONG ARMS HAPPY FACES!!

Step forward into CHAIR POWER POSE!!!! STRONG ARMS HAPPY FACES!!


From your Chair pose fold forward again and go through the sequence again, this time starting with the left side!!

HAVE FUN!!! This sequence is energizing and fun. Go through as many times as you like!

I hope you enjoy this sequence! I know my family had a blast!

Namaste— Cassy


Tips For Families to Stay Healthy at Home

I am guessing I’m not alone here…. I’ve noticed that being stuck at home with the kids over the last 6 months has made it easy for us to fall out of normal routines. Our schedule has become more and more relaxed, the kids have inevitably had more screen time, there has been more access to junk food snacks, and no regular recess or gym!! Of course maintaining this kind of lifestyle will eventually lead to unhealthy weight gain and reduced fitness. So if you are in the same boat we are in, you might ask, what can I do to help keep my family stay healthy? Here are some tips to keep everyone active and eating well.

Physical Activity

Encourage your kids to be active for least 30 minutes each day. Whenever possible, let them go outside and play. Go for a walk, run, bike ride, go for a hike, do yoga or play sports like soccer, basketball, or whiffle ball together as a family.

Additional resources are available online!

Sleep

Getting enough sleep has many health benefits, and helps kids keep a healthy weight. Help your kids get to bed on time and wake up at the same time every day. Skip daytime naps for older kids, and turn off all screens at least 1 hour before bed.

Sleep needs vary from child to child. But try for:

  • toddlers: 11–14 hours, including daytime naps

  • preschoolers: 10–13 hours, including naps

  • school-age kids and preteens: 9–12 hours a night

  • teens: 8–10 hours a night

Maintaining a schedule

Daily schedules can help everyone stick to routines. Besides setting consistent times for sleeping and eating, schedule time for:

  • reading/ educational activity

  • daily "gym class," recess, and other times to be active

  • screen time

  • chores or other household tasks

  • family time to play games, watch a movie, or do other things together, like baking

IMG_5270.jpeg

Nutrition

snack.png

Healthy snacks can help manage hunger and boost nutrition. An occasional treat is fine, but serve good-for-you snacks most of the time.

Make your home a healthy food zone. Put the focus on:

  • fruits and vegetables. Fresh is great, but frozen or canned fruit and veggies are good options, especially when you want to limit trips to the grocery store. Just choose ones with no added salt, sugar, syrups, or sauces.

  • whole grains, such as whole-grain bread, brown rice, quinoa, and whole-wheat pasta

  • foods high in protein, such as lean meats, dried or canned beans, eggs, and peanut butter.

    Healthy snacks can help manage hunger and boost nutrition. An occasional treat is fine, but serve good-for-you snacks most of the time.

  1. Set a Snack-Time Schedule

    Creating a consistent window where kids are offered snacks will help get them into a routine once school starts up. For little kids who tend to get hangry in the late afternoon, setting out a pre-dinner veggie plate will curb your child's appetite. It's a really great way to introduce new, healthy foods, too!

  2. Save time by slicing veggies
    Store sliced vegetables in the refrigerator and serve with dips like hummus or low-calorie dressing. Top half a whole-wheat English muffin with spaghetti sauce, chopped vegetables, and low-fat shredded mozzarella and melt in the microwave.

  3. Mix it up
    For older school-age kids, mix dried fruit, unsalted nuts, and popcorn in a snack-size bag for a quick trail mix. Blend plain fat-free or low-fat yogurt with 100% fruit juice and frozen peaches for a tasty smoothie.

  4. Rethink Your Family's Definition of Snacks
    Snacks are literally just another opportunity to eat, so I like to present them as mini meals. You can have something as easy as a hard-boiled egg. You always can give kids your leftover chicken and veggies from dinner the night before. And then for lunch, you could have a veggie and cheese tray; there aren't any food rules. I think we get caught up in the misconception that only certain foods are served in a certain time of day

  5. Go for great whole grains 
    Offer whole-wheat breads, popcorn, and whole-oat cereals that are high in fiber and low in added sugars, saturated fat, and sodium. Limit refined-grain products such as snack bars, cakes, and sweetened cereals.

  6. Nibble on lean protein
    Choose lean protein foods such as low-sodium deli meats or unsalted nuts. Wrap sliced, low-sodium deli turkey around an apple wedge. Store hard-cooked (boiled) eggs in the refrigerator for kids to enjoy any time.

  7. Involve your children in the making of snacks as much as possible.

    Everything tastes better when you make it yourself! Use weekends to prepare certain snacks ahead of time. If you can, stick them in the freezer until they are needed or store in the refrigerator in Tupperware for quick access.

  8. Fruits are quick and easy
    Fresh, frozen, dried, or canned fruits can be easy “grab-and-go” options that need little preparation. Offer whole fruit and limit the amount of 100% juice served.

  9. Swap out the sugar
    Keep healthier foods handy so kids avoid cookies, pastries, or candies between meals. Add seltzer water to a ½ cup of 100% fruit juice instead of offering soda.

  10. Prepare homemade goodies
    For homemade sweets, add dried fruits like apricots or raisins and reduce the amount of sugar in the recipe. Adjust recipes that include fats like butter or shortening by using unsweetened applesauce or prune puree for half the amount of fat.

I hope some of these tips help you and your family to stay healthy at home! I plan on researching more resources to share as we navigate these unprecedented times.
Love and light — Cassy


Circuit Training Exercises for Kids

Circuit Training Exercises for Kids

My 13 year old daughter is a natural athlete. If she is not on the court playing basketball, she is out on the field playing soccer or in the batter’s box waiting for that perfect pitch. Typically, on any given day, we are running around driving her from one activity to the next. Unfortunately, since the statewide lock-down due to the Covid 19 pandemic, sports have no longer been an outlet for her. My 10 year old daughter is a little less motivated to exercise, so she needs sports to stay active. Both my husband and I have not been able to get to the gym or yoga classes as much as we used to so we decided to come up with a circuit training plan for the whole family!!!

Getting the whole family involved is a a fun way to get the kids involved in physical fitness and put them on the path to a lifelong enjoyment of exercise. Working out as a family is a fun way to keep each other motivated, to reach for similar goals, to be a cheerleader for each other and to hold each other accountable. From simple games to weightlifting, children's circuit training exercises should be adapted to the level of the kids performing the circuit.

I created a circuit with body-weight exercises. You can substitute other body weight exercises too like jumping jacks, pull-ups, chin-ups and jumping rope. Timed dashes are a good circuit exercise, as well as hop scotch, high-knee skipping, giant steps down the length of a driveway or the width of a gym, "suicides" or line-to-line back and forth running.

It’s also fun to track your progress! Kids can practice vertical leaps by jumping next to a wall as high as they can with a piece of chalk in one hand, making a mark against the wall to see how high they can reach. Keep track of their results each week to gauge improvement.

To keep heart rates up, time each circuit so that everyone is working 30 to 60 seconds, with no more than a one-minute break between each leg of the circuit. Keep the circuit going for a minimum of 15 minutes. You can also play music during the workout to create more excitement.

Kid friendly workout .png

This circuit training exercise plan is a great one to get started. I recommend doing this exercise 2-3 times per week. I also found the list below of other exercises on Pinterest that you can use to mix and match for other circuit training exercise plans. It could be really run to go to a park and include other friends too!!

exersice.jpg


Alright team! I hope this post inspires you to get active as a family! I would love to hear how it goes or any other exercise plans you enjoy doing together!

Namaste- Cassy


Fun Summer Activities For Kids to Keep Cool

July has arrived so that means it is finally summer in PNW! Since my kids have been out of school for 4 months already and the weather has been so hit or miss, they have been a little too reliant on their screen time to provide their summer entertainment.

So today I am going to share some cool (pun intended) summer activities to get your kids outdoors and away from their electronics. With just a few supplies, you can make this a summer to remember!

Ice Bowling

Supplies:

  • food coloring

  • water balloons

  • water bottles

  • water

To make the frozen bowling ball fill up water balloons and put them in the freezer overnight.   For added fun you can add drops of food coloring to the balloon before filling.  Let the balloon freeze over night. The next day remove the balloon to reveal your frozen bowling ball. Fill up the water bottles with water. Again add some food coloring for flair! Set up the water bottle pins and then role the frozen ball down the lane!

Make a Giant Slip and Slide

Check out All Things Thrifty for plans to create your very own giant slip and slide.

Frozen Excavation

Freeze dollar store toys in varying weights in a large container of water. Challenge kids to find the toys by chipping away at the ice with a hammer. To release ice from the container, you may need to submerge the container in a sink of hot water for a few seconds. Tip: Avoid injury by having your kids wear safety glasses.

Make sidewalk paint

Combine 1/2 cup water and 1/2 cup cornstarch in a blender, and blend on low speed until smooth. Transfer to a plastic bowl and stir in 12 drops of food coloring. Use paintbrushes and sponges to decorate the sidewalk. The paint washes away with water.

Water Balloon Pinatas

Paging Fun Mums outlines a super fun activity using water balloons as pinatas.

I hope you enjoy some or all of these fun and cool summer activities!!

Namaste- Cassy

5 Ways to cultivate empathy in your children

5 Ways to cultivate empathy in your children

empathy.jpg

I love this poem entitled “Empathy” by Morgan Harper Nichols. When Nichol’s writes, “your soles are worn, your strength is torn under the weight of a story I have never lived before” she is finding common ground between herself and another person. She recognizes the pain in another because she has also felt similar pain and offers support as she “holds the door” for that person.

Empathy is the ability to truly be present. It is the ability to hold a safe space for others to feel their own emotions completely and to be able to understand their experience. Feeling understood is not only a basic human need but it is also how we connect, help, and support one another. If we can’t recognize someone in pain, how can we support them? If we are unable to accept and empathize with our own emotions, it is difficult to be present to people around us. And for this reason, empathy is crucial for our ability to connect.

Teaching empathy? That might sound strange if you think of empathy as an innate, fixed trait -- a talent that some people are born with, and others lack.

But empathy isn't an all or nothing proposition. It isn't something that unfolds automatically, in every situation. It isn't even a single ability or skill. So empathy isn't something you either have or lack, and it isn't something that develops automatically, without input from the environment. Personal experience matters. Culture matters. Parenting matters.

Here are 5 ways to cultivate empathy in your child -- tips inspired by scientific research.

First, let’s start with examples of what empathy looks like.

Copy of Practice Empathy Activities for children.png
  1. Talk to your kids about their emotions.

    Talking to your children about their emotions will help your child to make associations of what type of emotions others are feeling, as well as to speculate reasons they may be feeling that way.

    To take it a step further, try to explain the definitions of different emotions. By helping them to be able to express these emotions in words, you will help them to develop more empathy.

  • Make different emotion faces and have children guess what you might be feeling.

  • Throughout the day, help children learn to label their own emotions (e.g., it looks like you are feeling mad that we can't go outside; what can we do to help you feel better?)

  • While reading stories to children, have children guess how the characters in the story are feeling. Ask questions like “How can you tell that the character is feeling that way? Can you make a face that shows that feeling?”

2. Watch TV and Movies Together

When watching a show together point out the different character’s emotions and feelings in situations and talk about the behaviors behind the feelings and how you know when someone is sad, mad, happy, embarrassed etc. based on their actions.

If your child is younger, you can make comments during the show, such as “Oh wow, that little girl looks really sad. I wonder if it’s because her friend had to go home? What do you think?”

This will help engage your child into the emotions of the different characters, instead of just the events going on, on screen.

With older children, you can discuss the emotions after the show when you discuss the story as a whole. perhaps point out examples when your child may have felt those emotions as well, and what others did, or could have done, to contribute or help in a given situation.

3. Volunteer to help others in need.

Another great way to help your child develop more empathy, is to help those less fortunate. You can volunteer at a local soup kitchen, find things around the house to donate, or volunteer at a local animal shelter. Teaching children how to care for animals is a great way to teach them empathy because caring for others has been shown to improve self-esteem, understand the value of life, increases compassion, and helps children understand that they have the power to make others feel good. This is a great time to have a conversation on why it’s important to care about others.Try to keep the conversations open, and discuss how not everyone lives the same, and that some people have a lot of struggles to deal with.

4. Be an Example

The best way to teach your children to be empathetic, is to be a role model. Let your children see you show empathy for other’s around you and of course show empathy to your children. Show your kids that it is OK to cry and to be sad when there is a tragedy. Try not to hide these feelings. Children need to know that it’s normal to have feelings. They need to know not to hide or deny their feelings. So if something sad happens, and you want to cry, feel free to do so, and then explain to your child why. On the flip side when you are feeling happy or inspired share those feelings with you kiddos as well!

5. Model respect for those who seem different.

Children are naturally fascinated by those who are different. If a child is curious about someone with a disability, don't just shush them. Make friends with the person and allow your child to see that this person is more similar to him or her than different. Often, the person will explain his disability to your child, if your child is prompted to ask respectful questions.

These are just a few tips to ensure that you can help your child reach her innate potential to be empathic and kind. However, there is no substitute for acting empathic yourself, and allowing your child to observe you. Your child will learn the most from watching you interact with others in a kind, empathic way! If you are interested in some further resources, I have included 10 children’s books that teach empathy below.

Namaste- Cassy

10-Books-about-empathy-2.jpg